Lead Enrichment for Zoho CRM
Introduction
WebAmigo provides a powerful data enrichment solution for Zoho CRM, a feature you can activate directly from the Zoho Marketplace to enrich your lead data. Once integrated, it adds a smart layer of intelligence to your modules by automatically fetching missing details such as job titles, company information, social profiles, and much more from publicly available sources.
Key Benefits
- Eliminate Manual Research - Save hours by replacing tedious lead research with instant, automated data enrichment.
- Gain an Instant, Holistic View - Get a comprehensive overview of any contact or company with a single click.
- Act Quickly and Confidently - Access the insights needed to make faster, more informed decisions without delay.
- Connect on a Deeper Level - Understand your contacts better to enable more personalized and effective communication.
Getting Started with the Extension
You can install the WebAmigo's Lead Enrichment extension either directly from the Zoho Marketplace or log into your Zoho CRM account and install it.
To install from Zoho CRM
- Go to Setup > Marketplace > All.
The list of installed extensions will be displayed. - Click All Extensions, then browse for and click WebAmigo - Lead Enrichment for Zoho CRM.
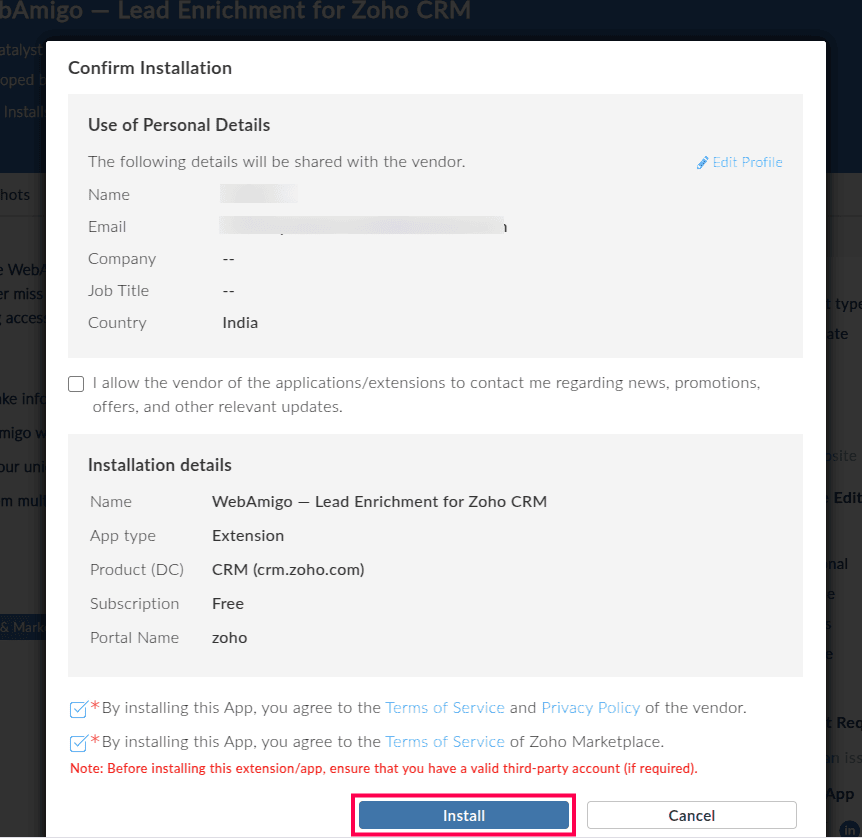
- Click Install in the extension page.
- In the popup, agree to the Terms of Service and click Install.
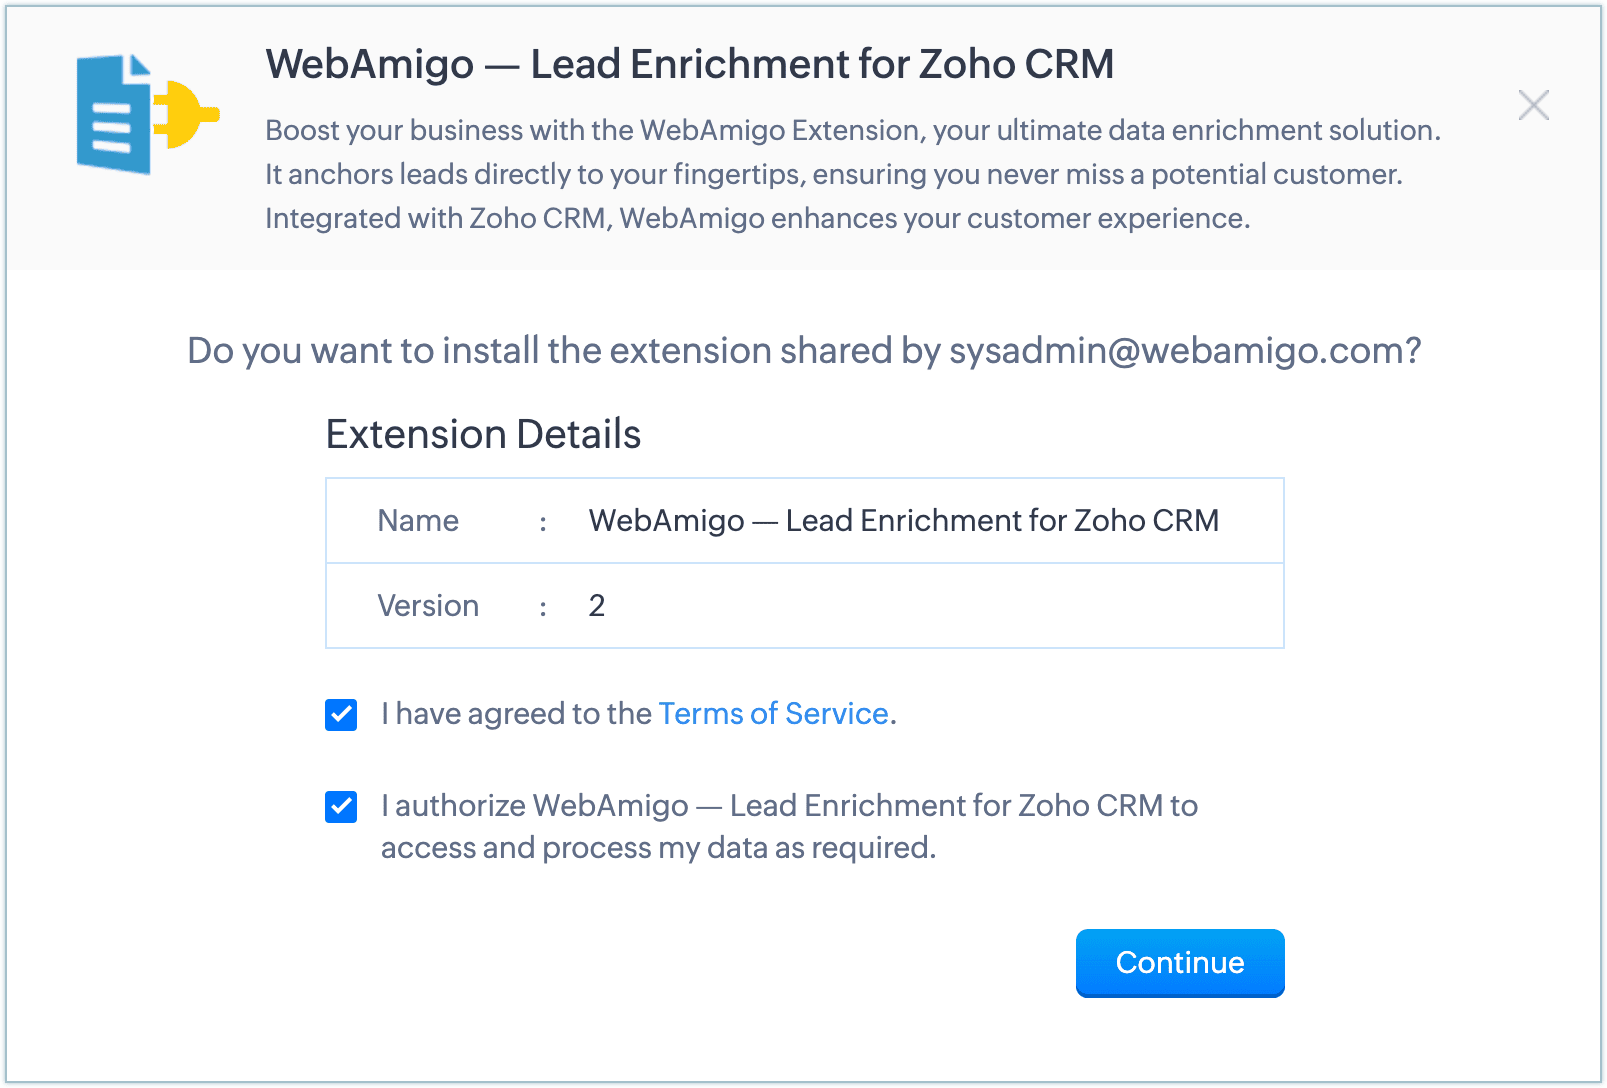
- In the Privacy Declaration box, read the statement and click Agree and Continue.
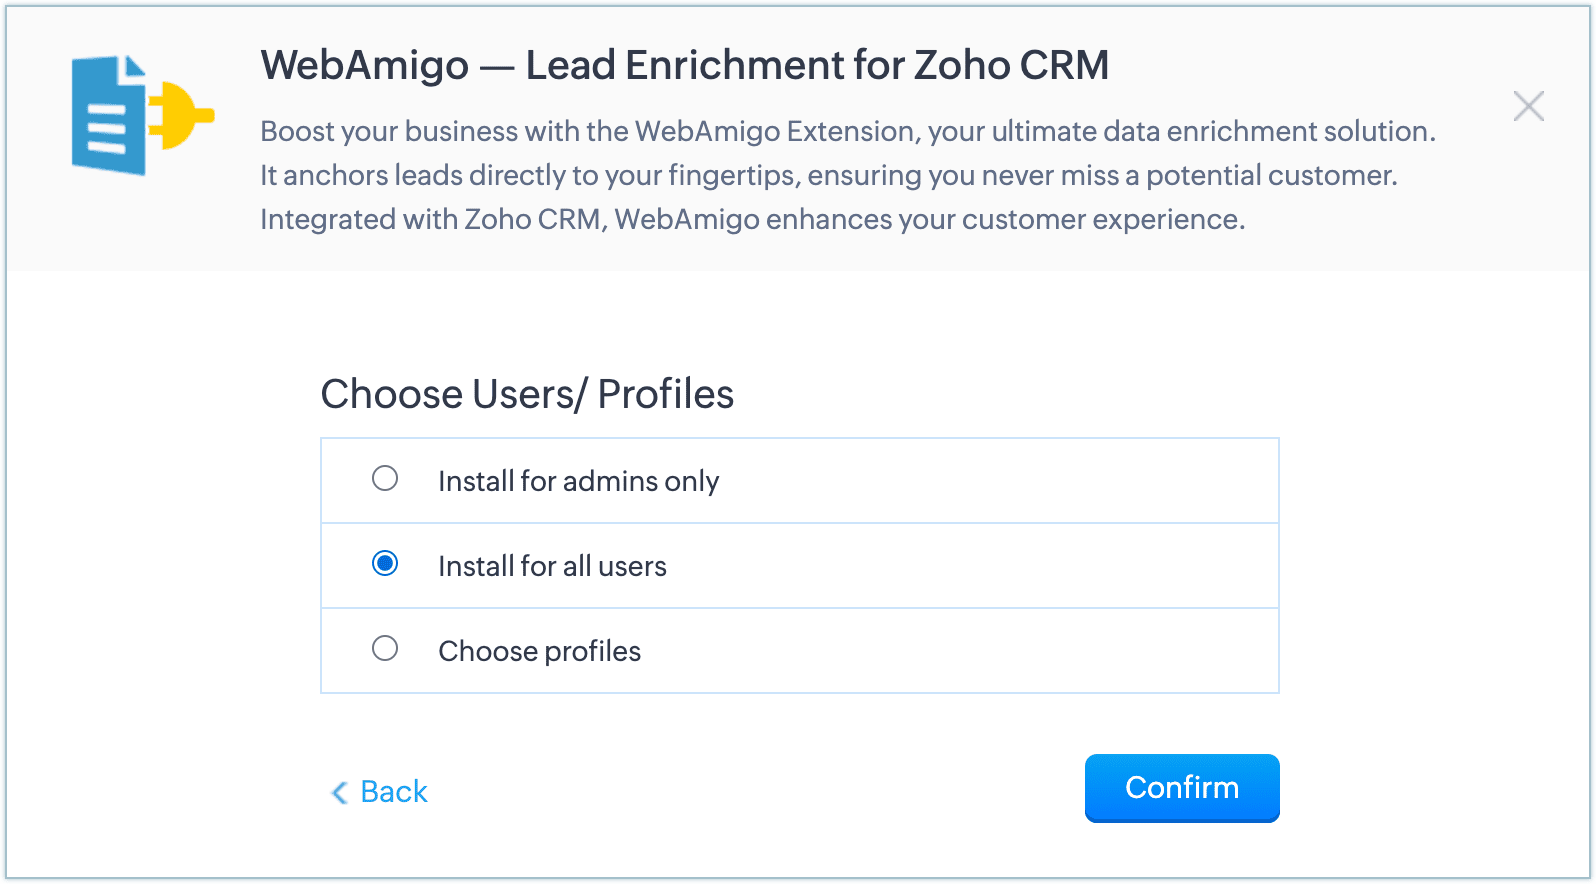
- In the Choose Users/Profiles section, select the users for whom the extension needs to be installed.
- Install for admin only - The extension will be installed only for the users with the administrator profile.
- Install for all users - The extension will be installed for all users.
- Choose profiles - The extension will be installed only for the selected users. Choose this option, click Continue, then select the required profiles. The extension will be installed for the chosen profiles, and you will be automatically redirected to the Extension Settings page.
- After installation, you will receive free credits to get started.
- New customers receive 500 free credits (valid for 3 months).
- Existing customers receive 3000 free credits (lifetime validity).
- When your credits are used up (or expired for new customers), you can purchase additional credits to continue using WebAmigo.
- For New Customers, if you purchase additional credits before your free credits expire, the unused free credits will be automatically added up with your purchased credits and will have lifetime validity.
- The enrichment button will be enabled only for the profiles you choose
during installation:
- If you install it for Admins only, standard users will not be able to access the Enrich button unless the admin updates the button permissions in the settings.
- If you choose All Users or Selected Profiles, those users will see the button in the enriched modules.
- Once you create an enriched module, changing the profile settings later will not update the button access for that module.
Setting up the WebAmigo - Lead Enrichment extension
Once the extension is installed, you need to set up the Zoho CRM modules to be enriched by the WebAmigo - Lead Enrichment extension.
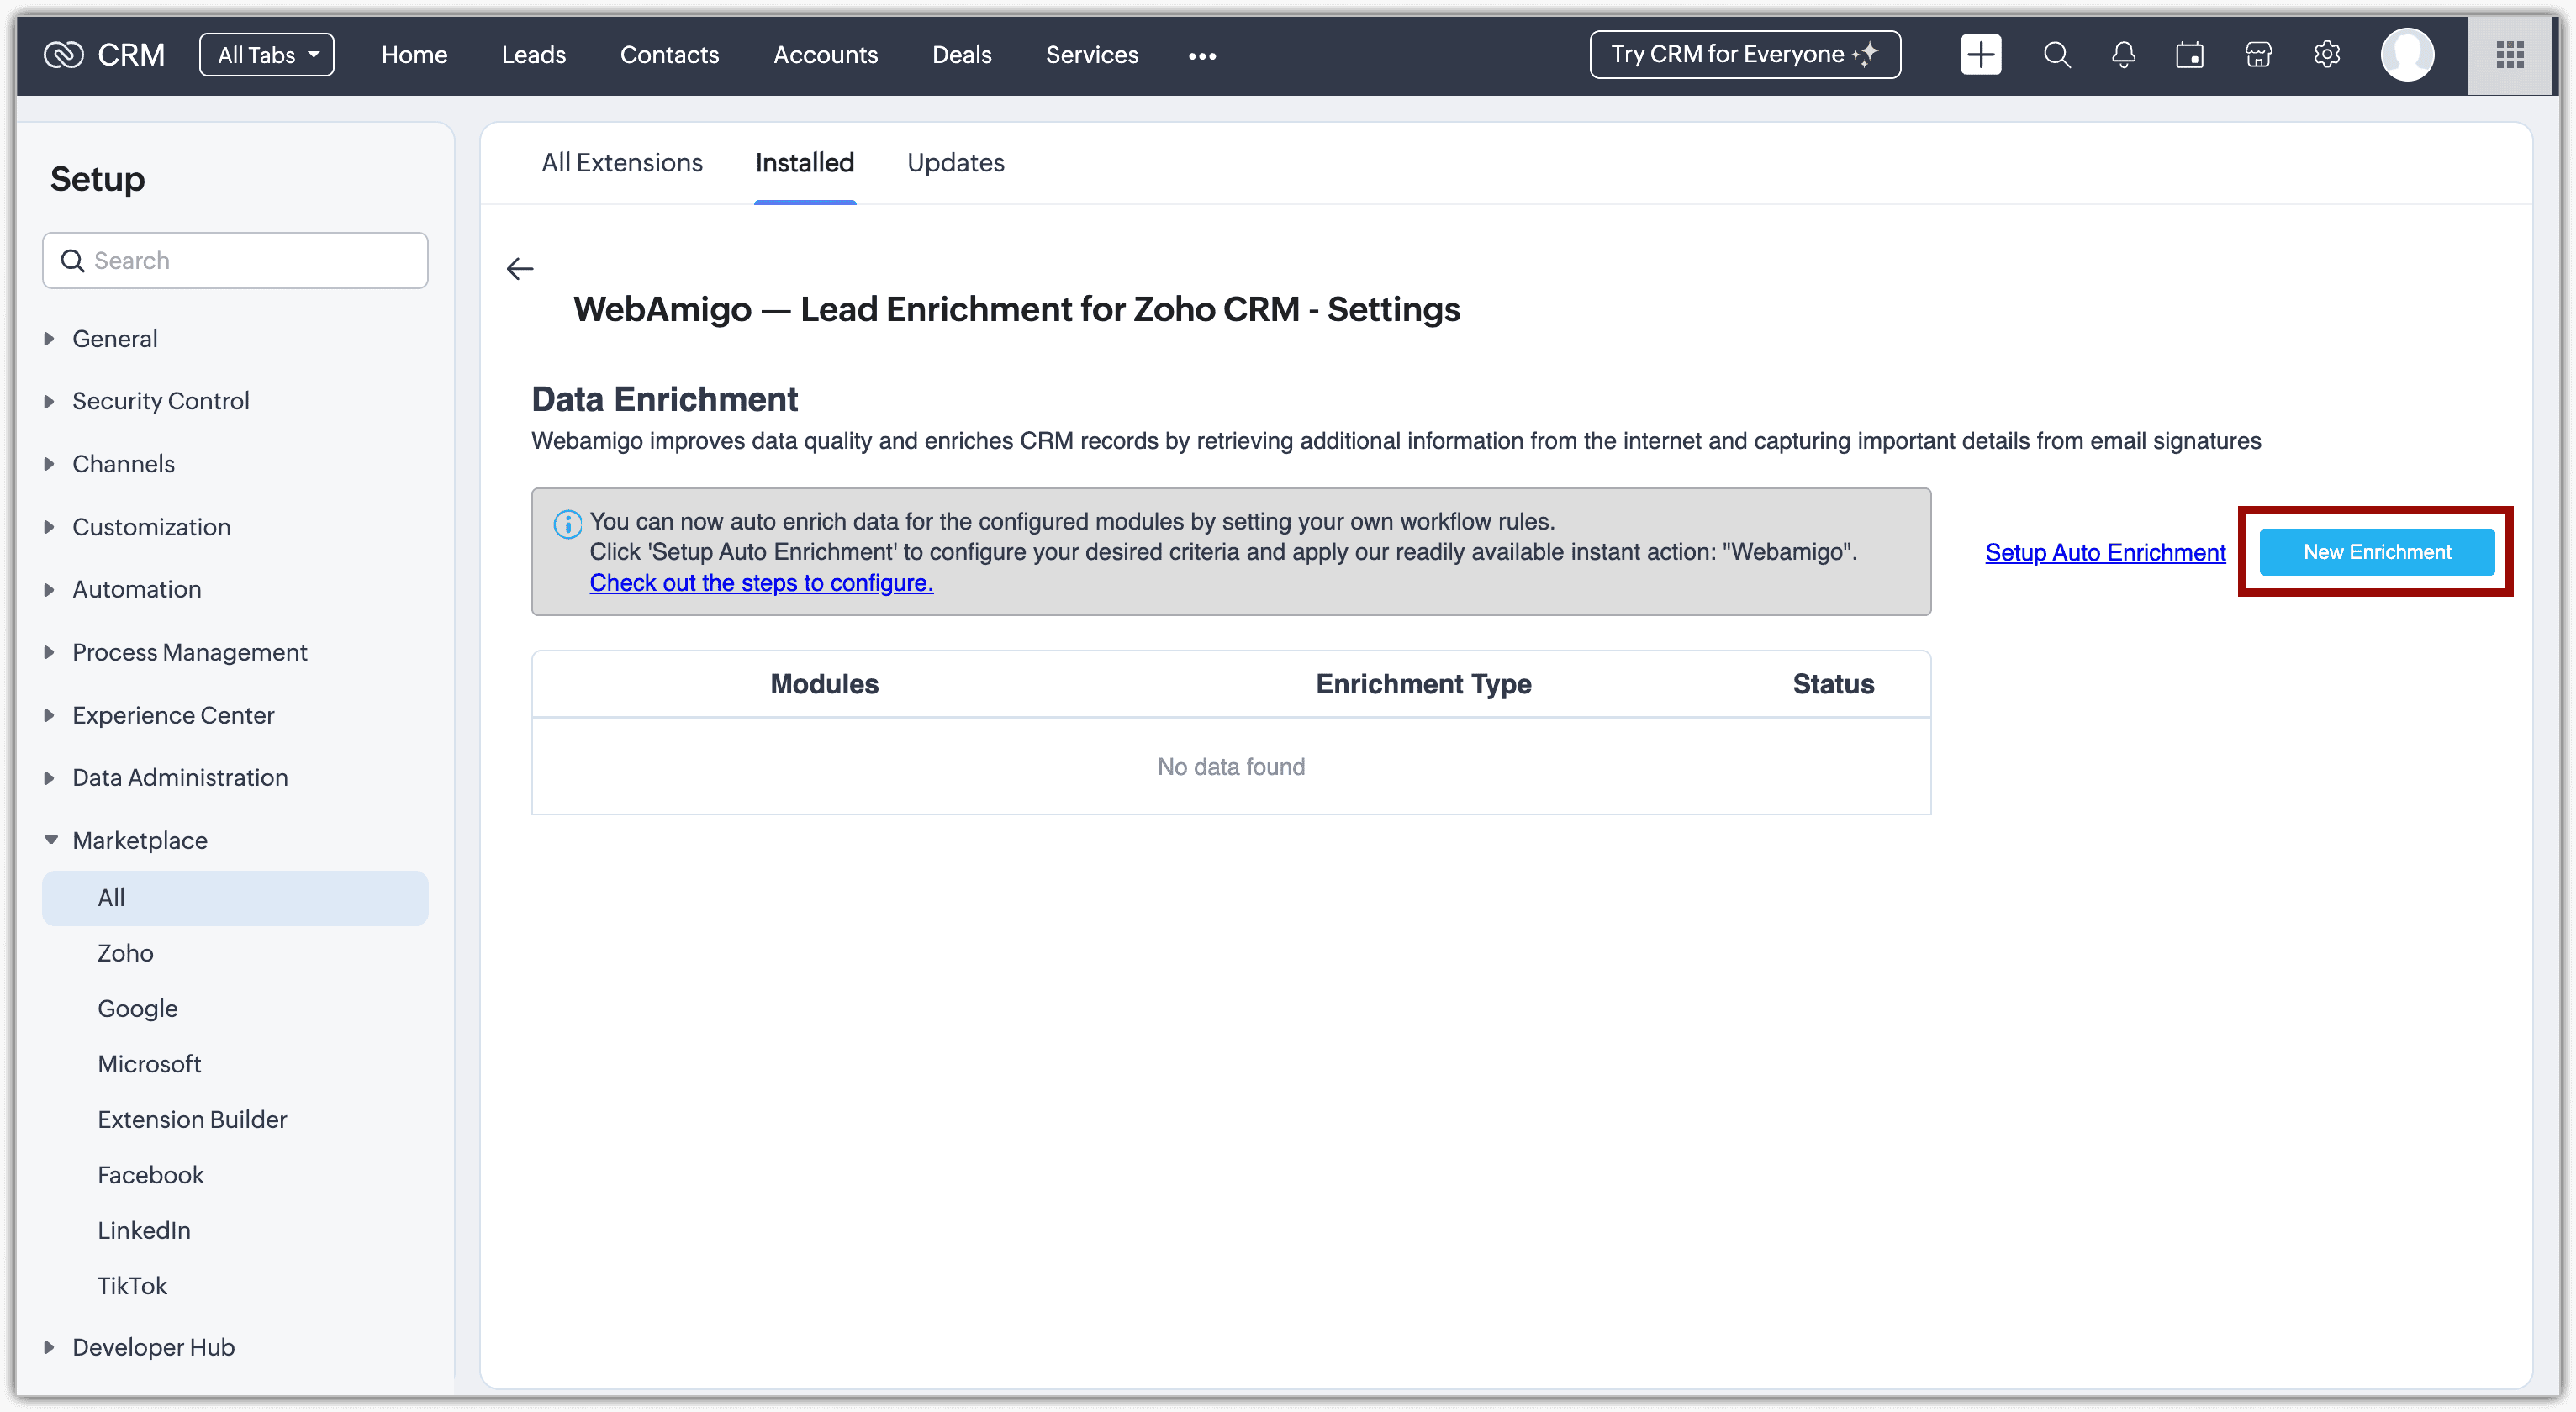
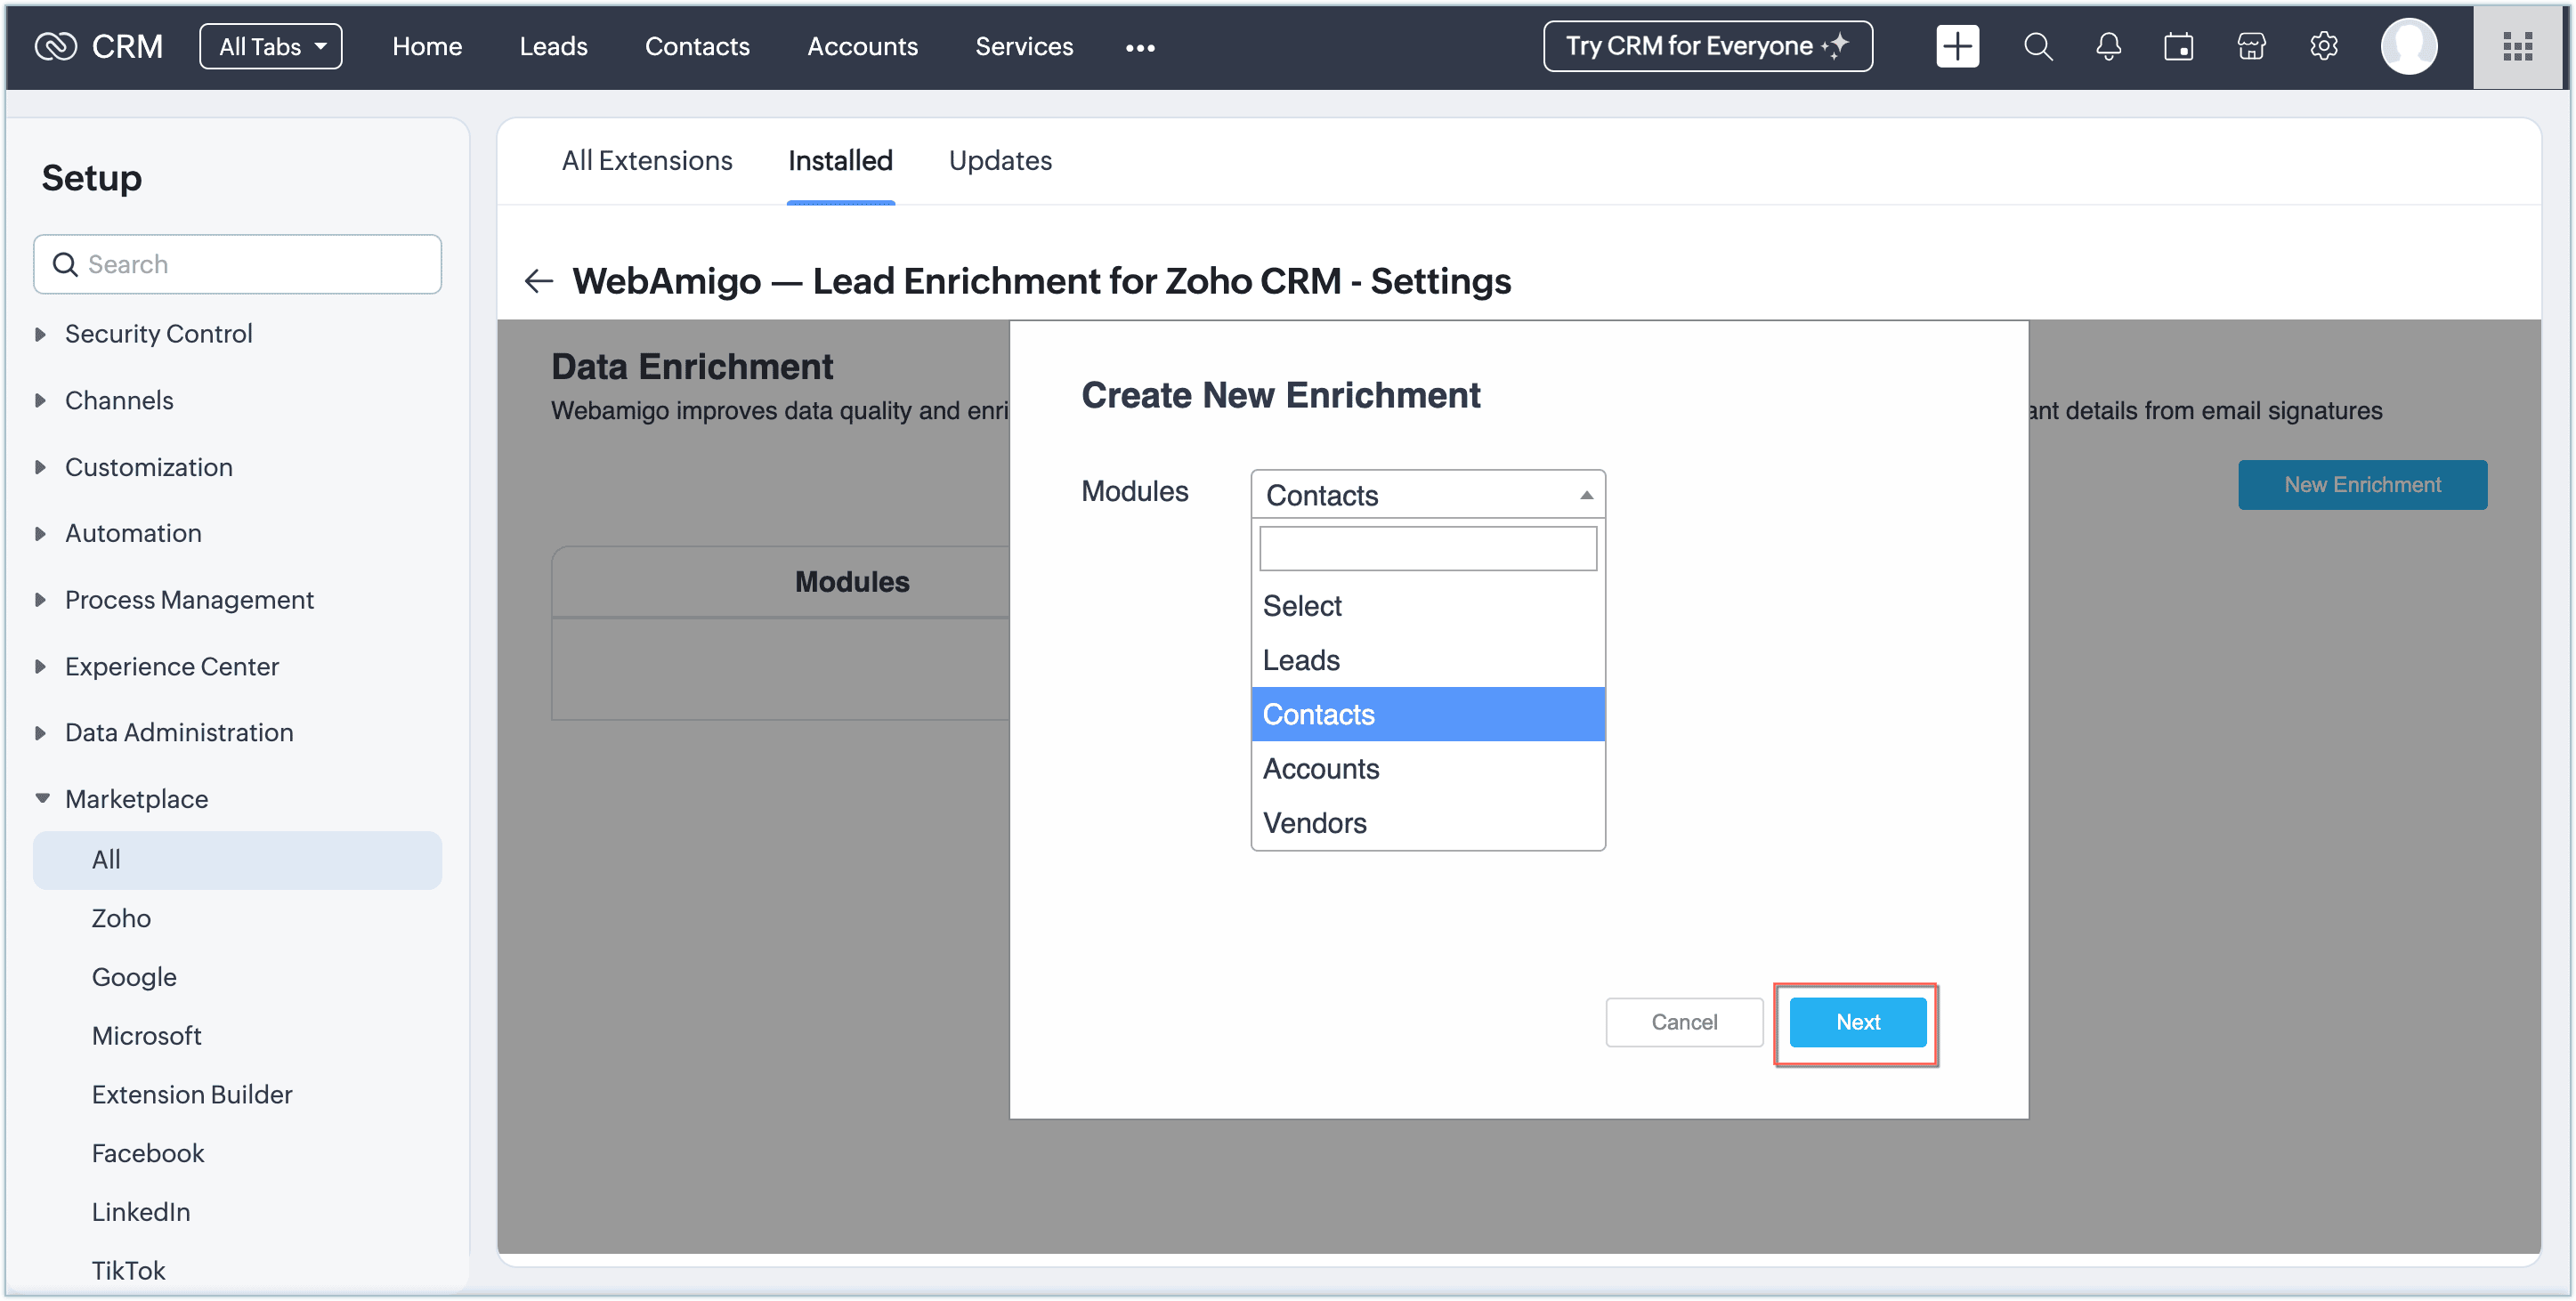
- In the WebAmigo - Lead Enrichment for Zoho CRM - Settings page, click on the New Enrichment button.
- Under Create New Enrichment, select the Module you
want to enrich from the dropdown list, and click
Next.
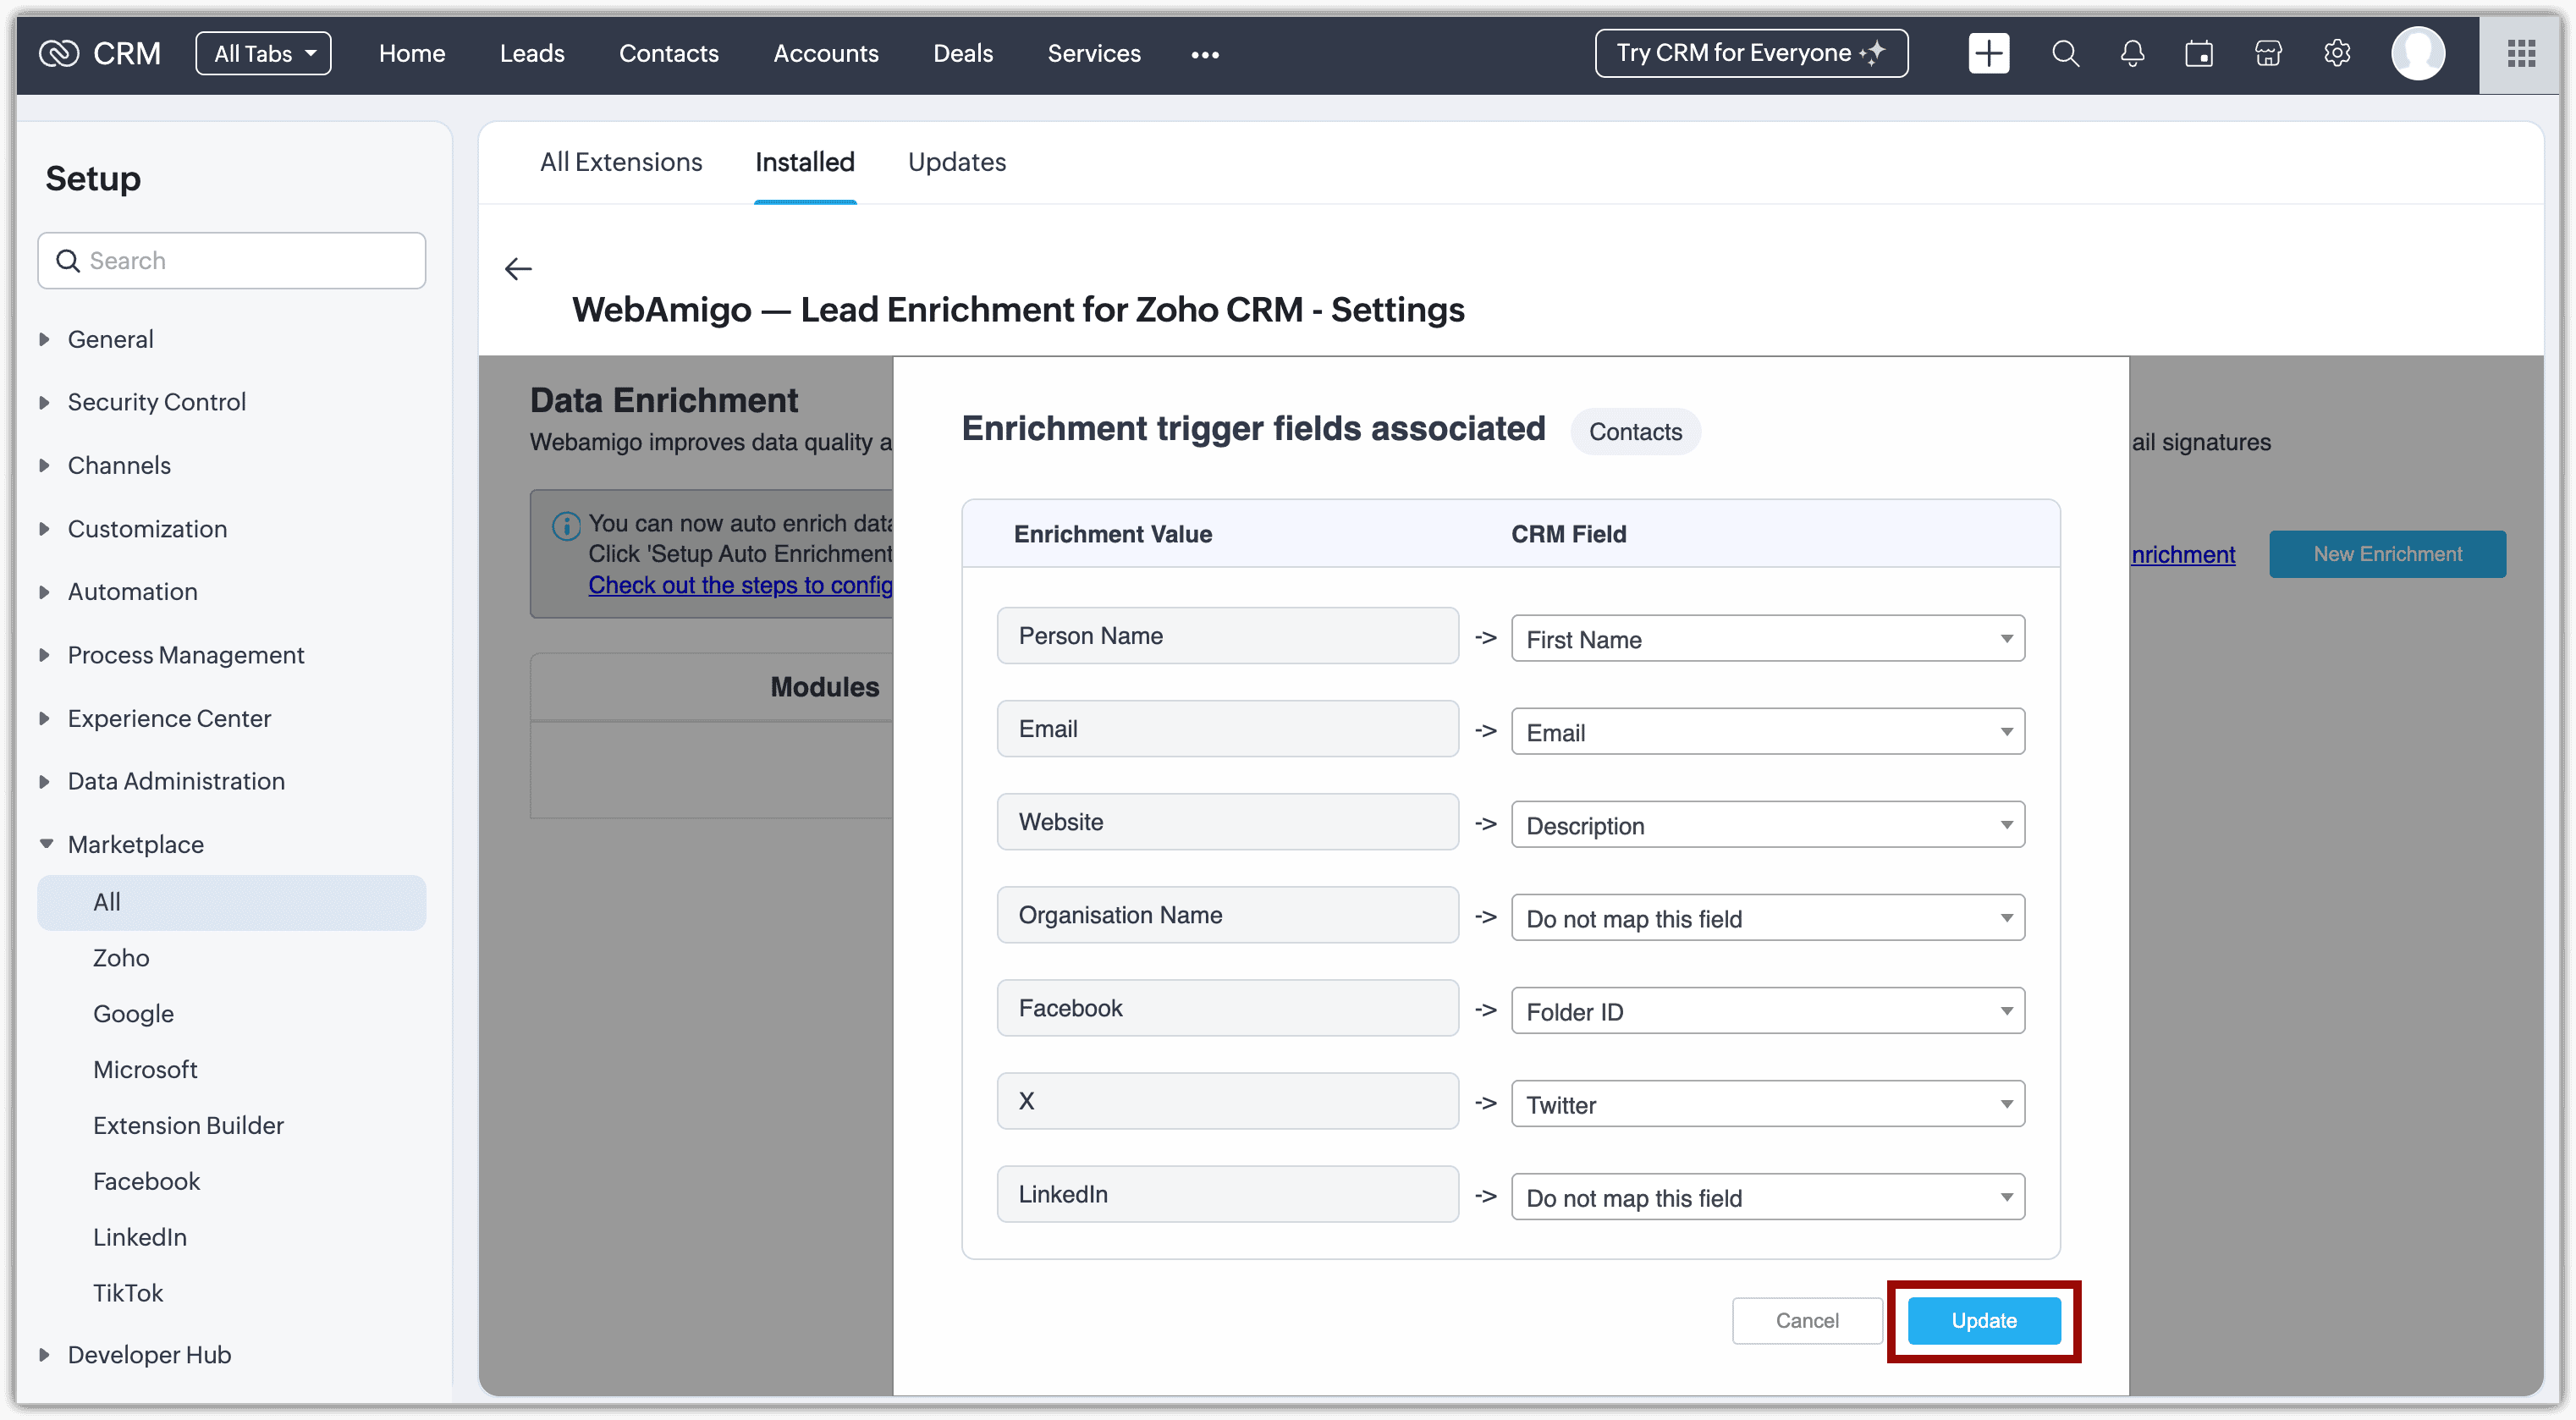
Repeat the step for every module you want to enrich individually. - You will be redirected to the page where you have to map the CRM
fields to the corresponding enrichment values
and click Update.
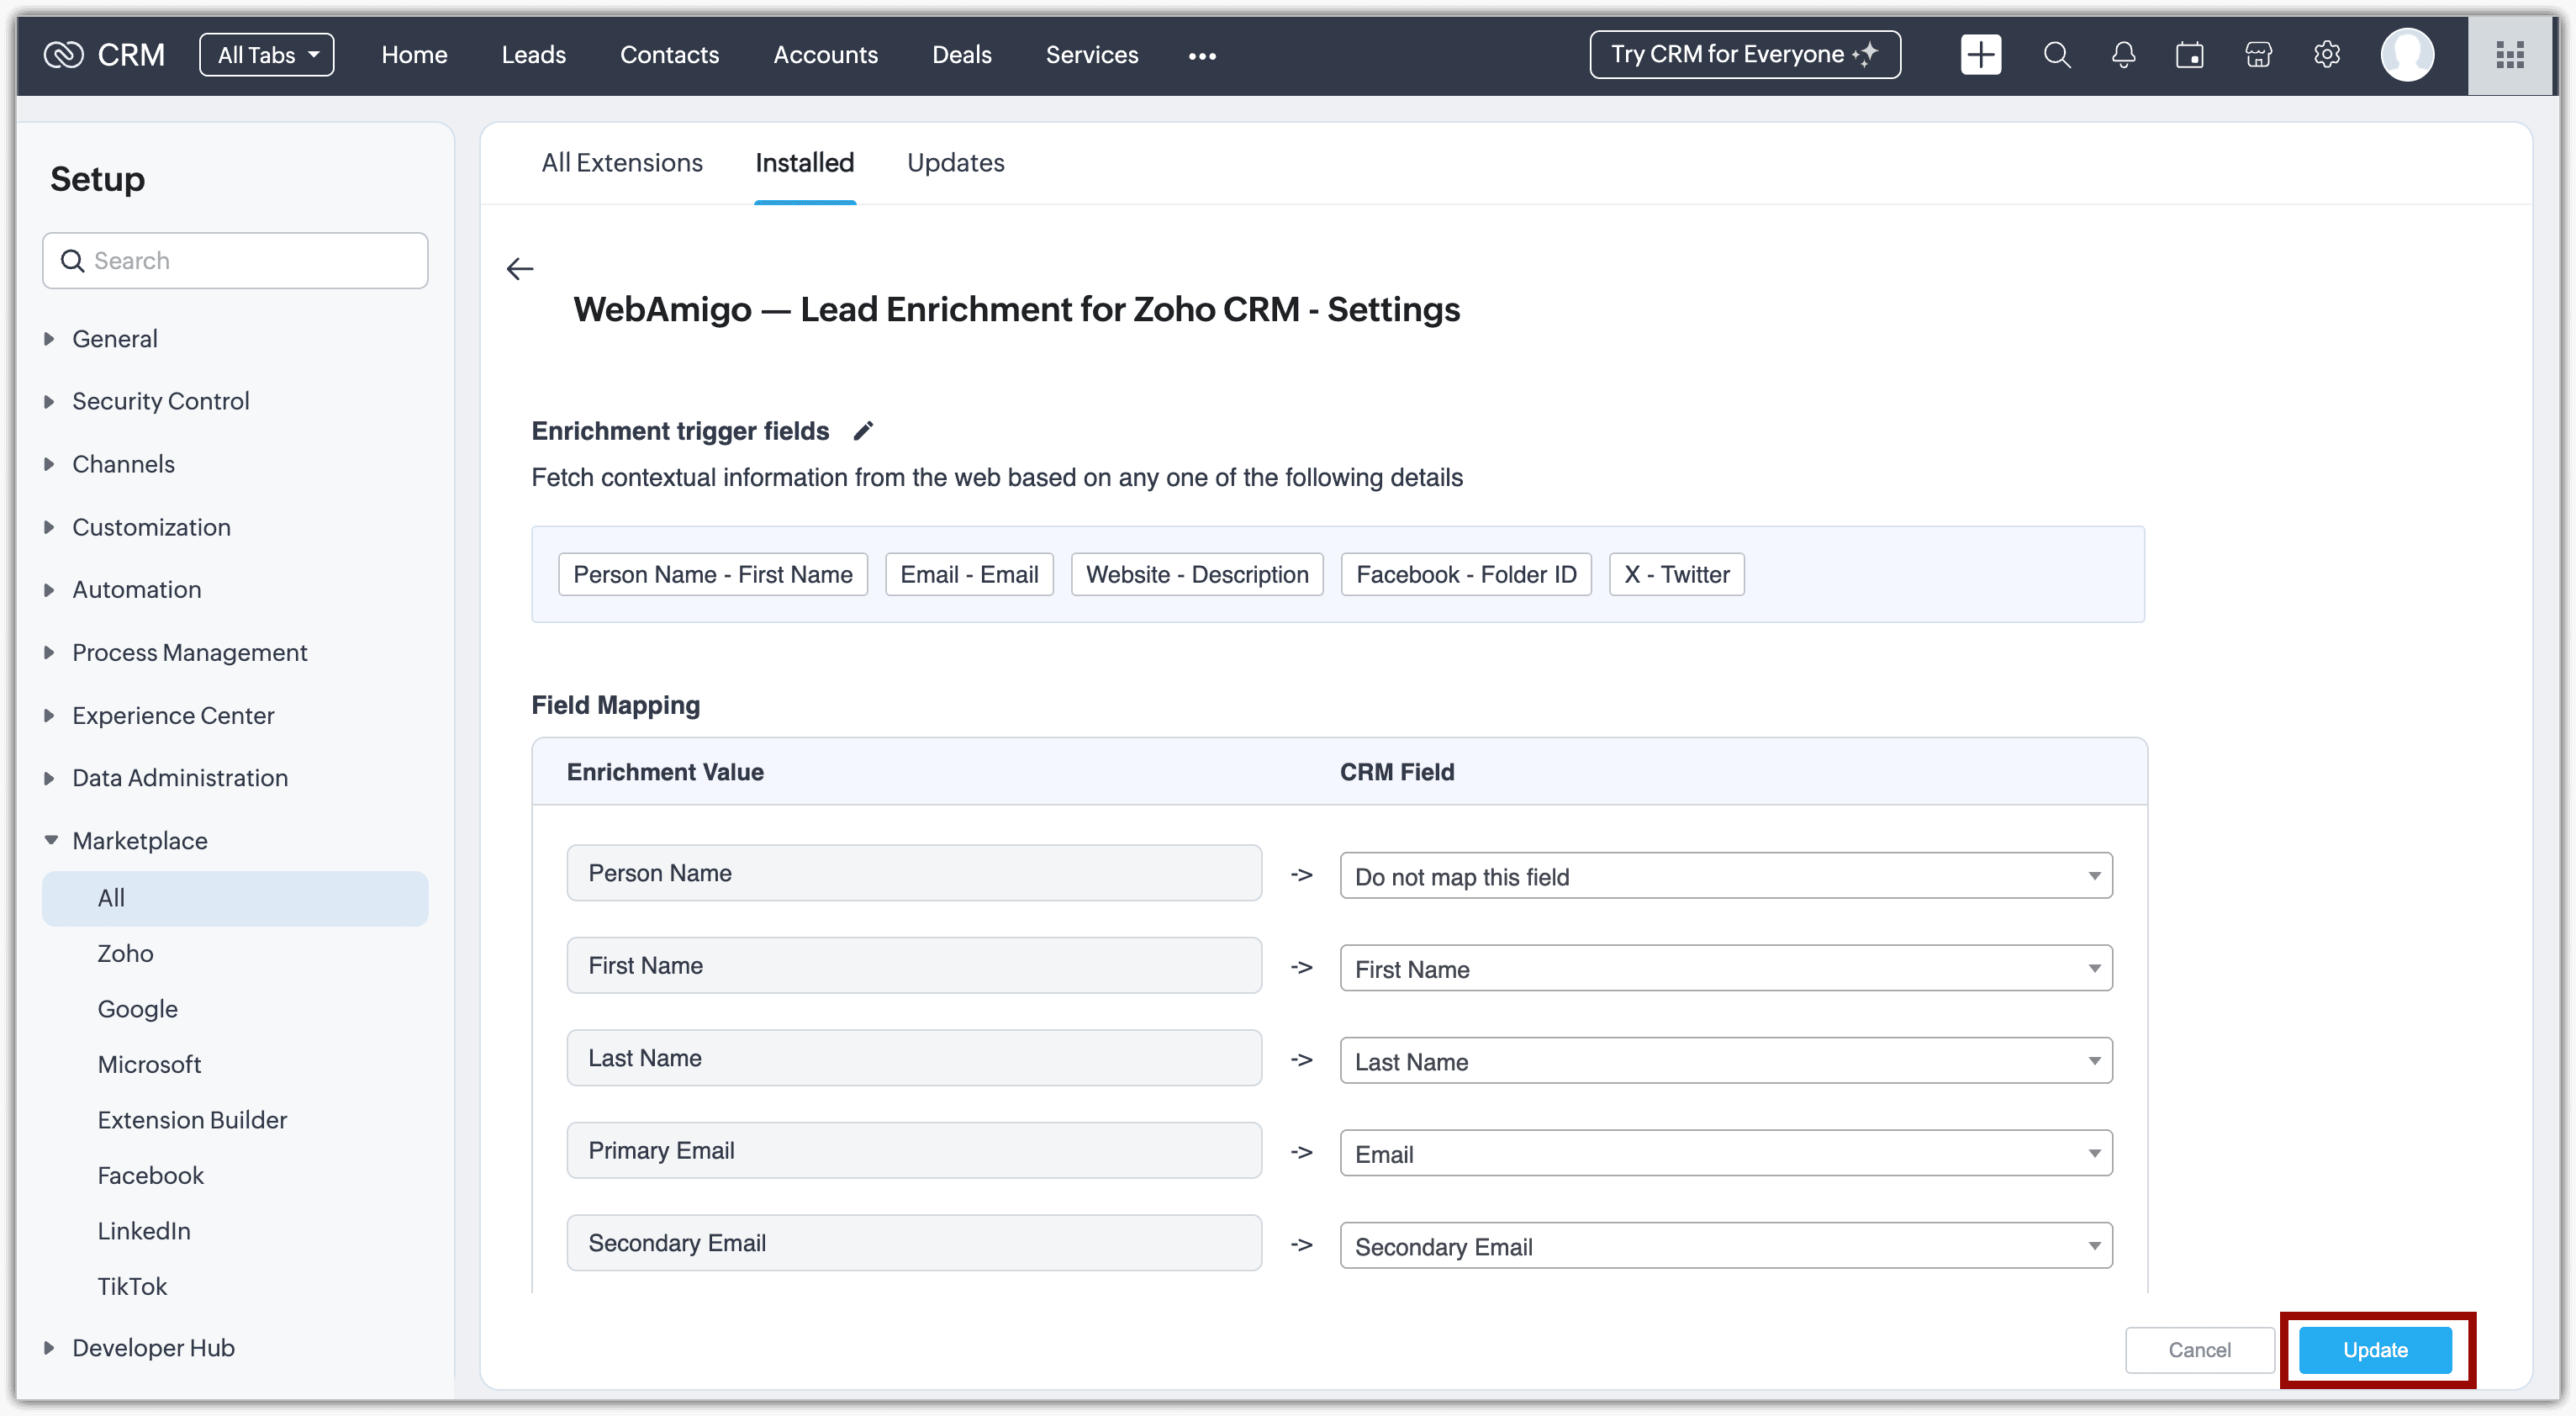
This mapping allows you to search data based on the criteria you assign to each element. - Once you've updated the Criteria Mapping section, you will be automatically redirected to the WebAmigo - Lead Enrichment Settings. Here, you can map the relevant Zoho CRM fields where you want the enriched data to be populated.
- The selected module is now ready for enrichment while viewing, creating, or editing a record.
Once a module enrich/configuration gets created/updated, kindly reload the CRM page to access the created custom button.
- Person Name & Organization Name
- Person Name & Website
- Email (Can be a standalone field)
- Linkedin (Can be a standalone field)
- Facebook (Can be a standalone field)
- Twitter (Can be a standalone field)
How to Enrich Data
Once you've completed the initial setup and field mappings for WebAmigo, you are all set to start enriching your CRM records.
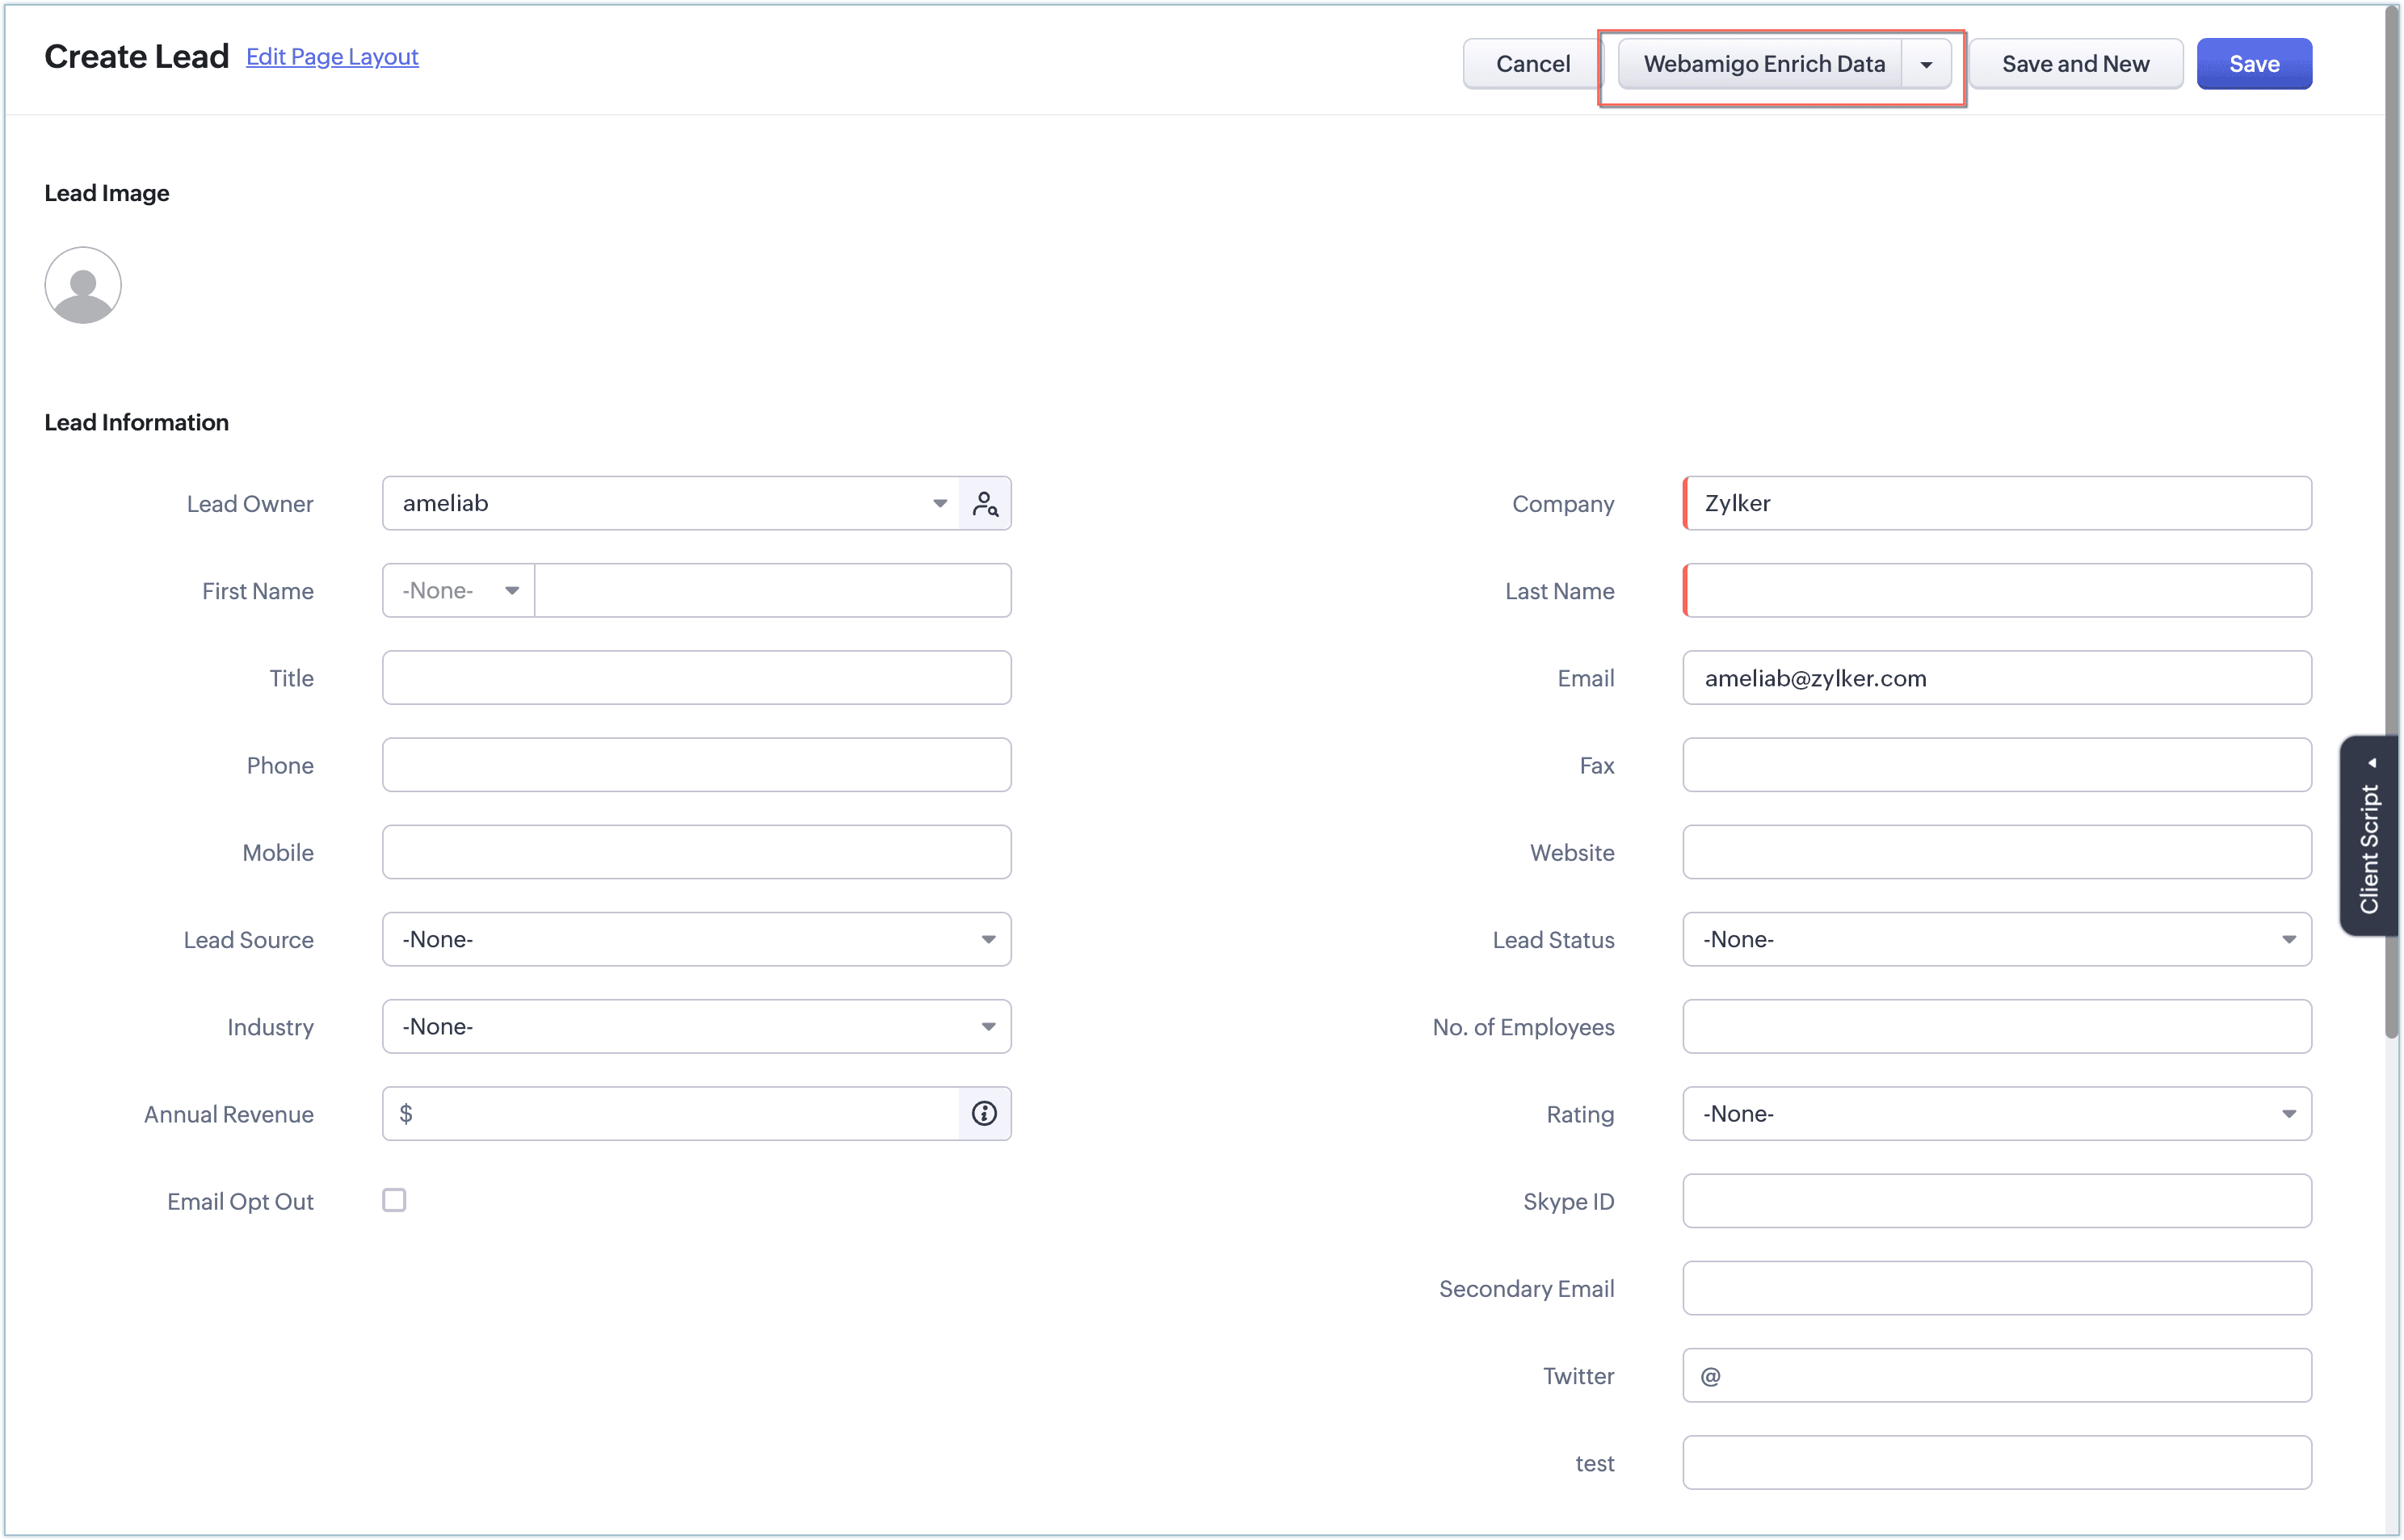
- Navigate to the Enriched module (any module you have selected for data enrichment before configuring the criteria mapping) in your Zoho CRM account.
- Create a new record in that module.
- Once you've entered the values in the CRM fields, click on the "WebAmigo Enrich Data" button on top of the panel.
- WebAmigo's Lead Enrichment will now process the data based on the criteria and field mappings you configured earlier.
- The system searches the WebAmigo database or connected sources and populates any missing or updated fields in the CRM record.
- Once the enrichment is complete, you will see updated values for the mapped fields such as email, phone number, company details, LinkedIn URL, and more.
- Now, click Update. The enriched data will be automatically populated into the respective fields and saved instantly.
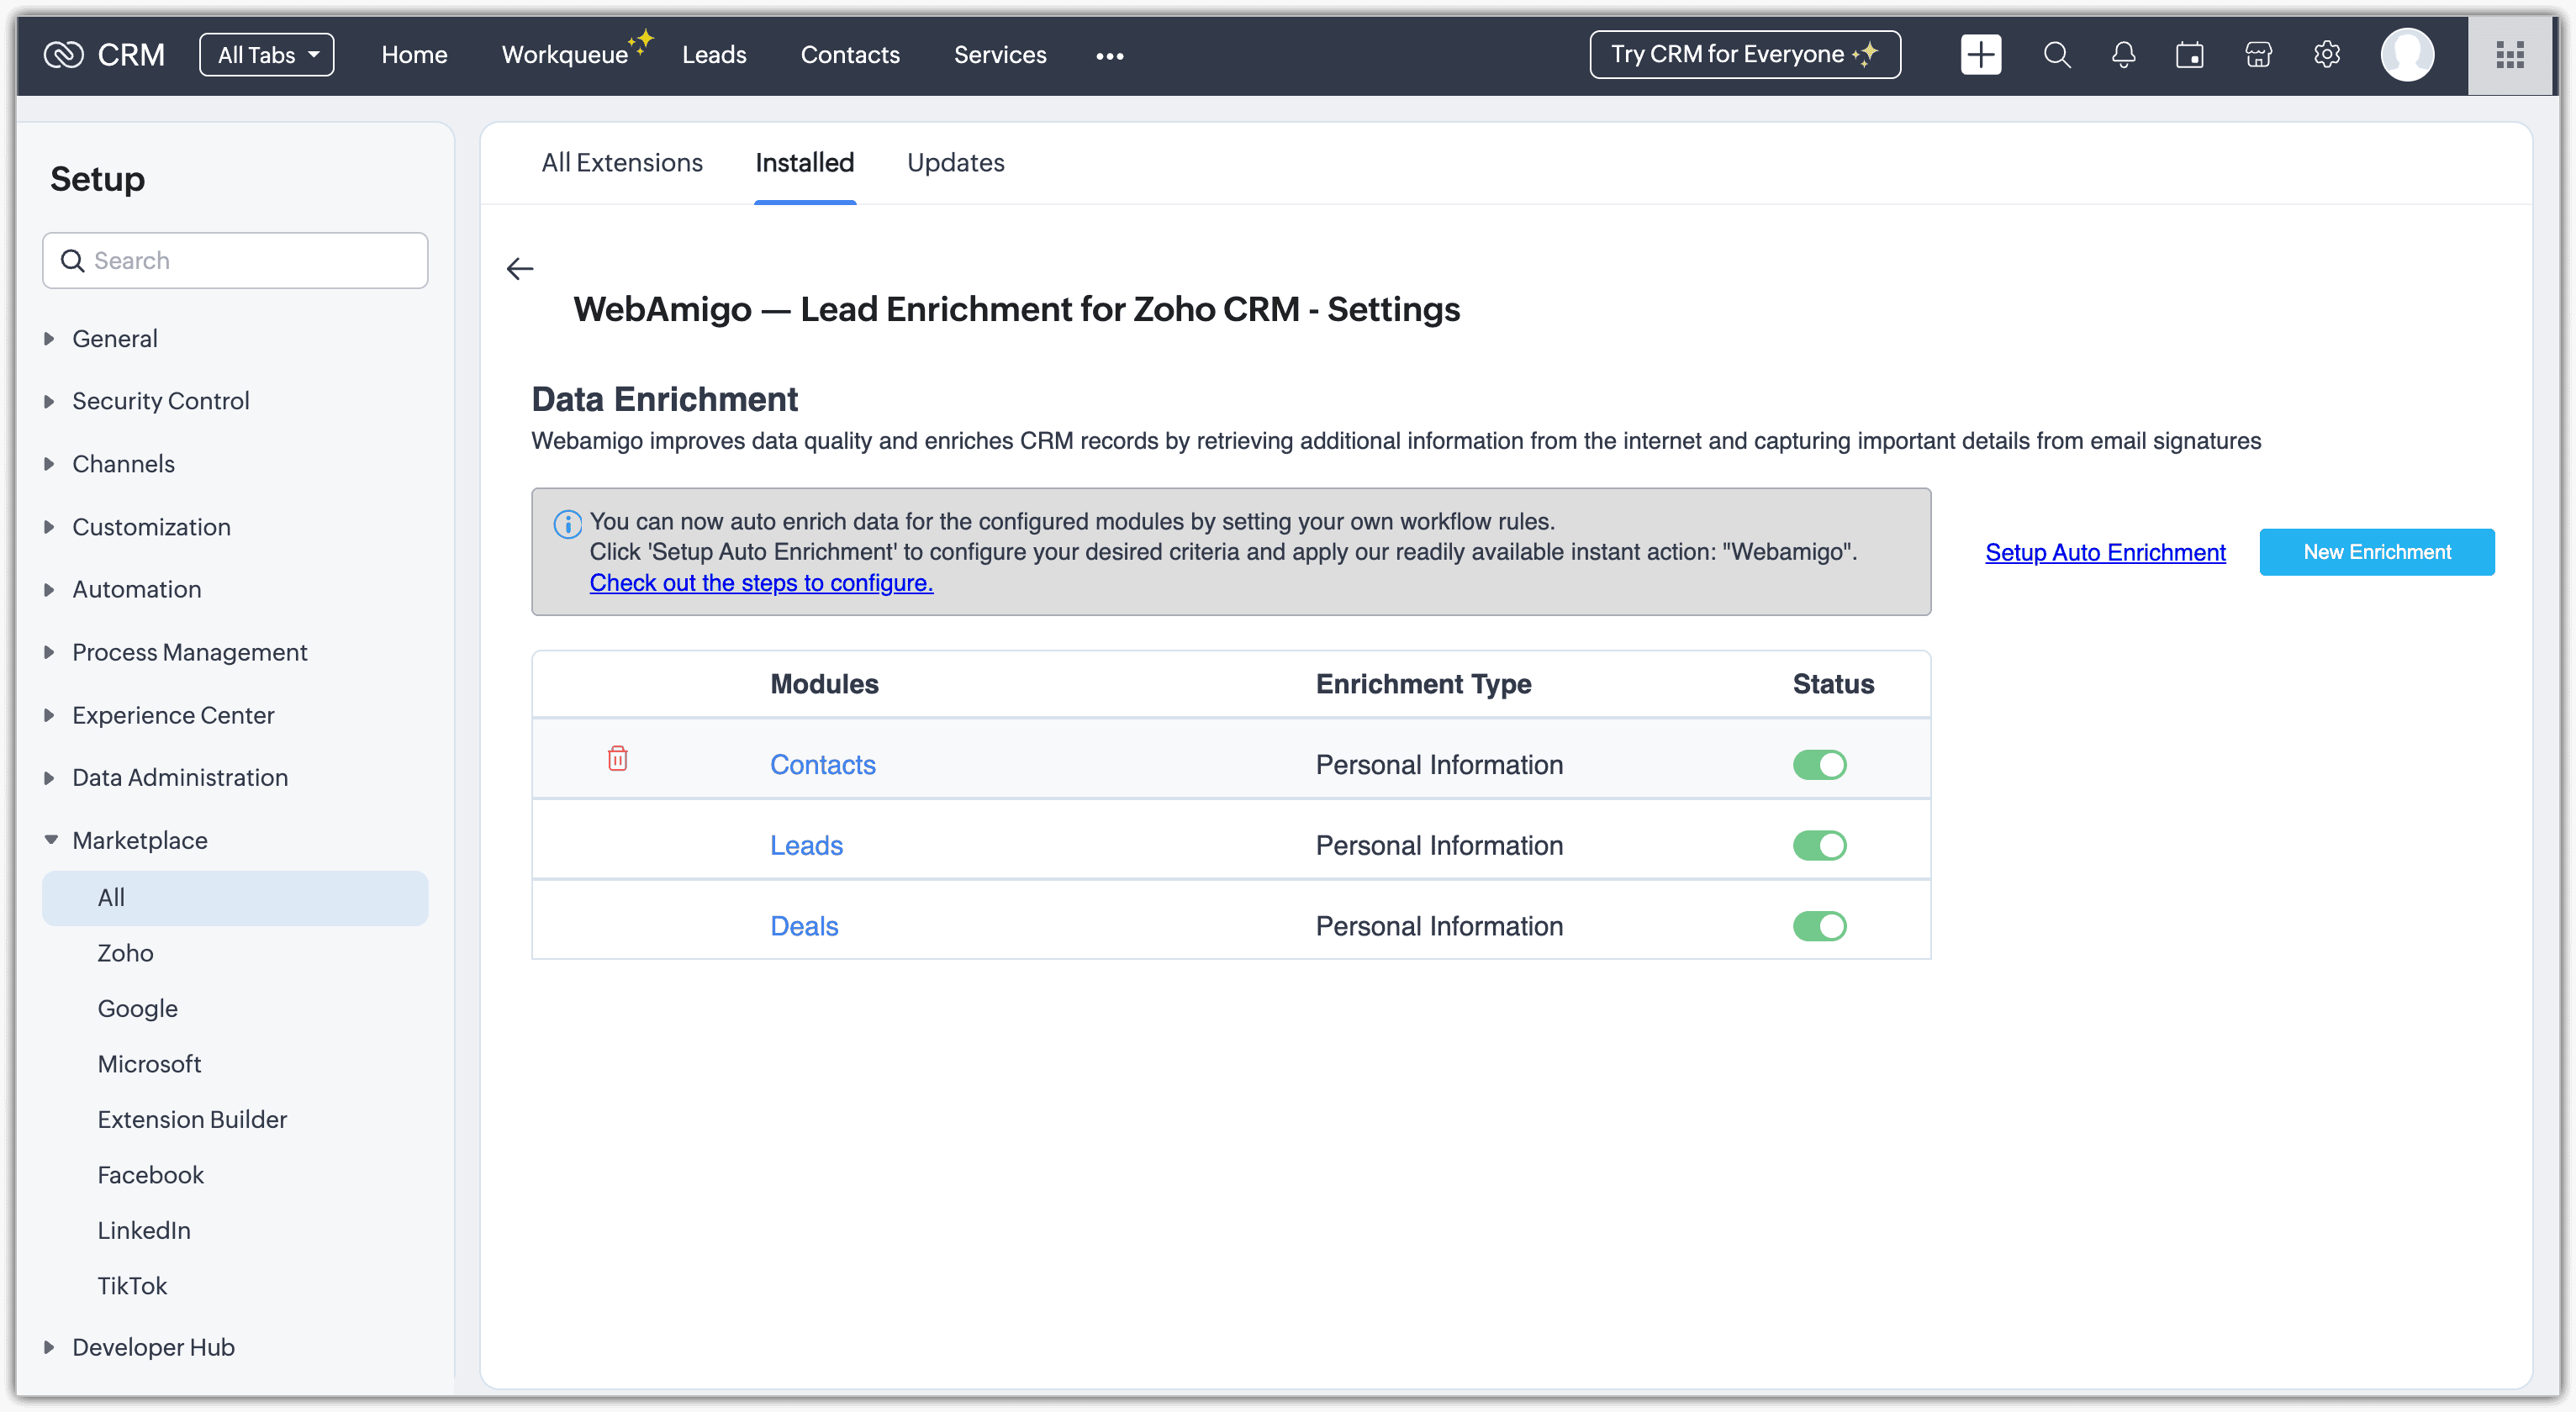
Setting up auto enrichment
Along with the manual data enrichment, you can also configure for auto data enrichment, with which you can have your data enriched whenever the conditions you define match.
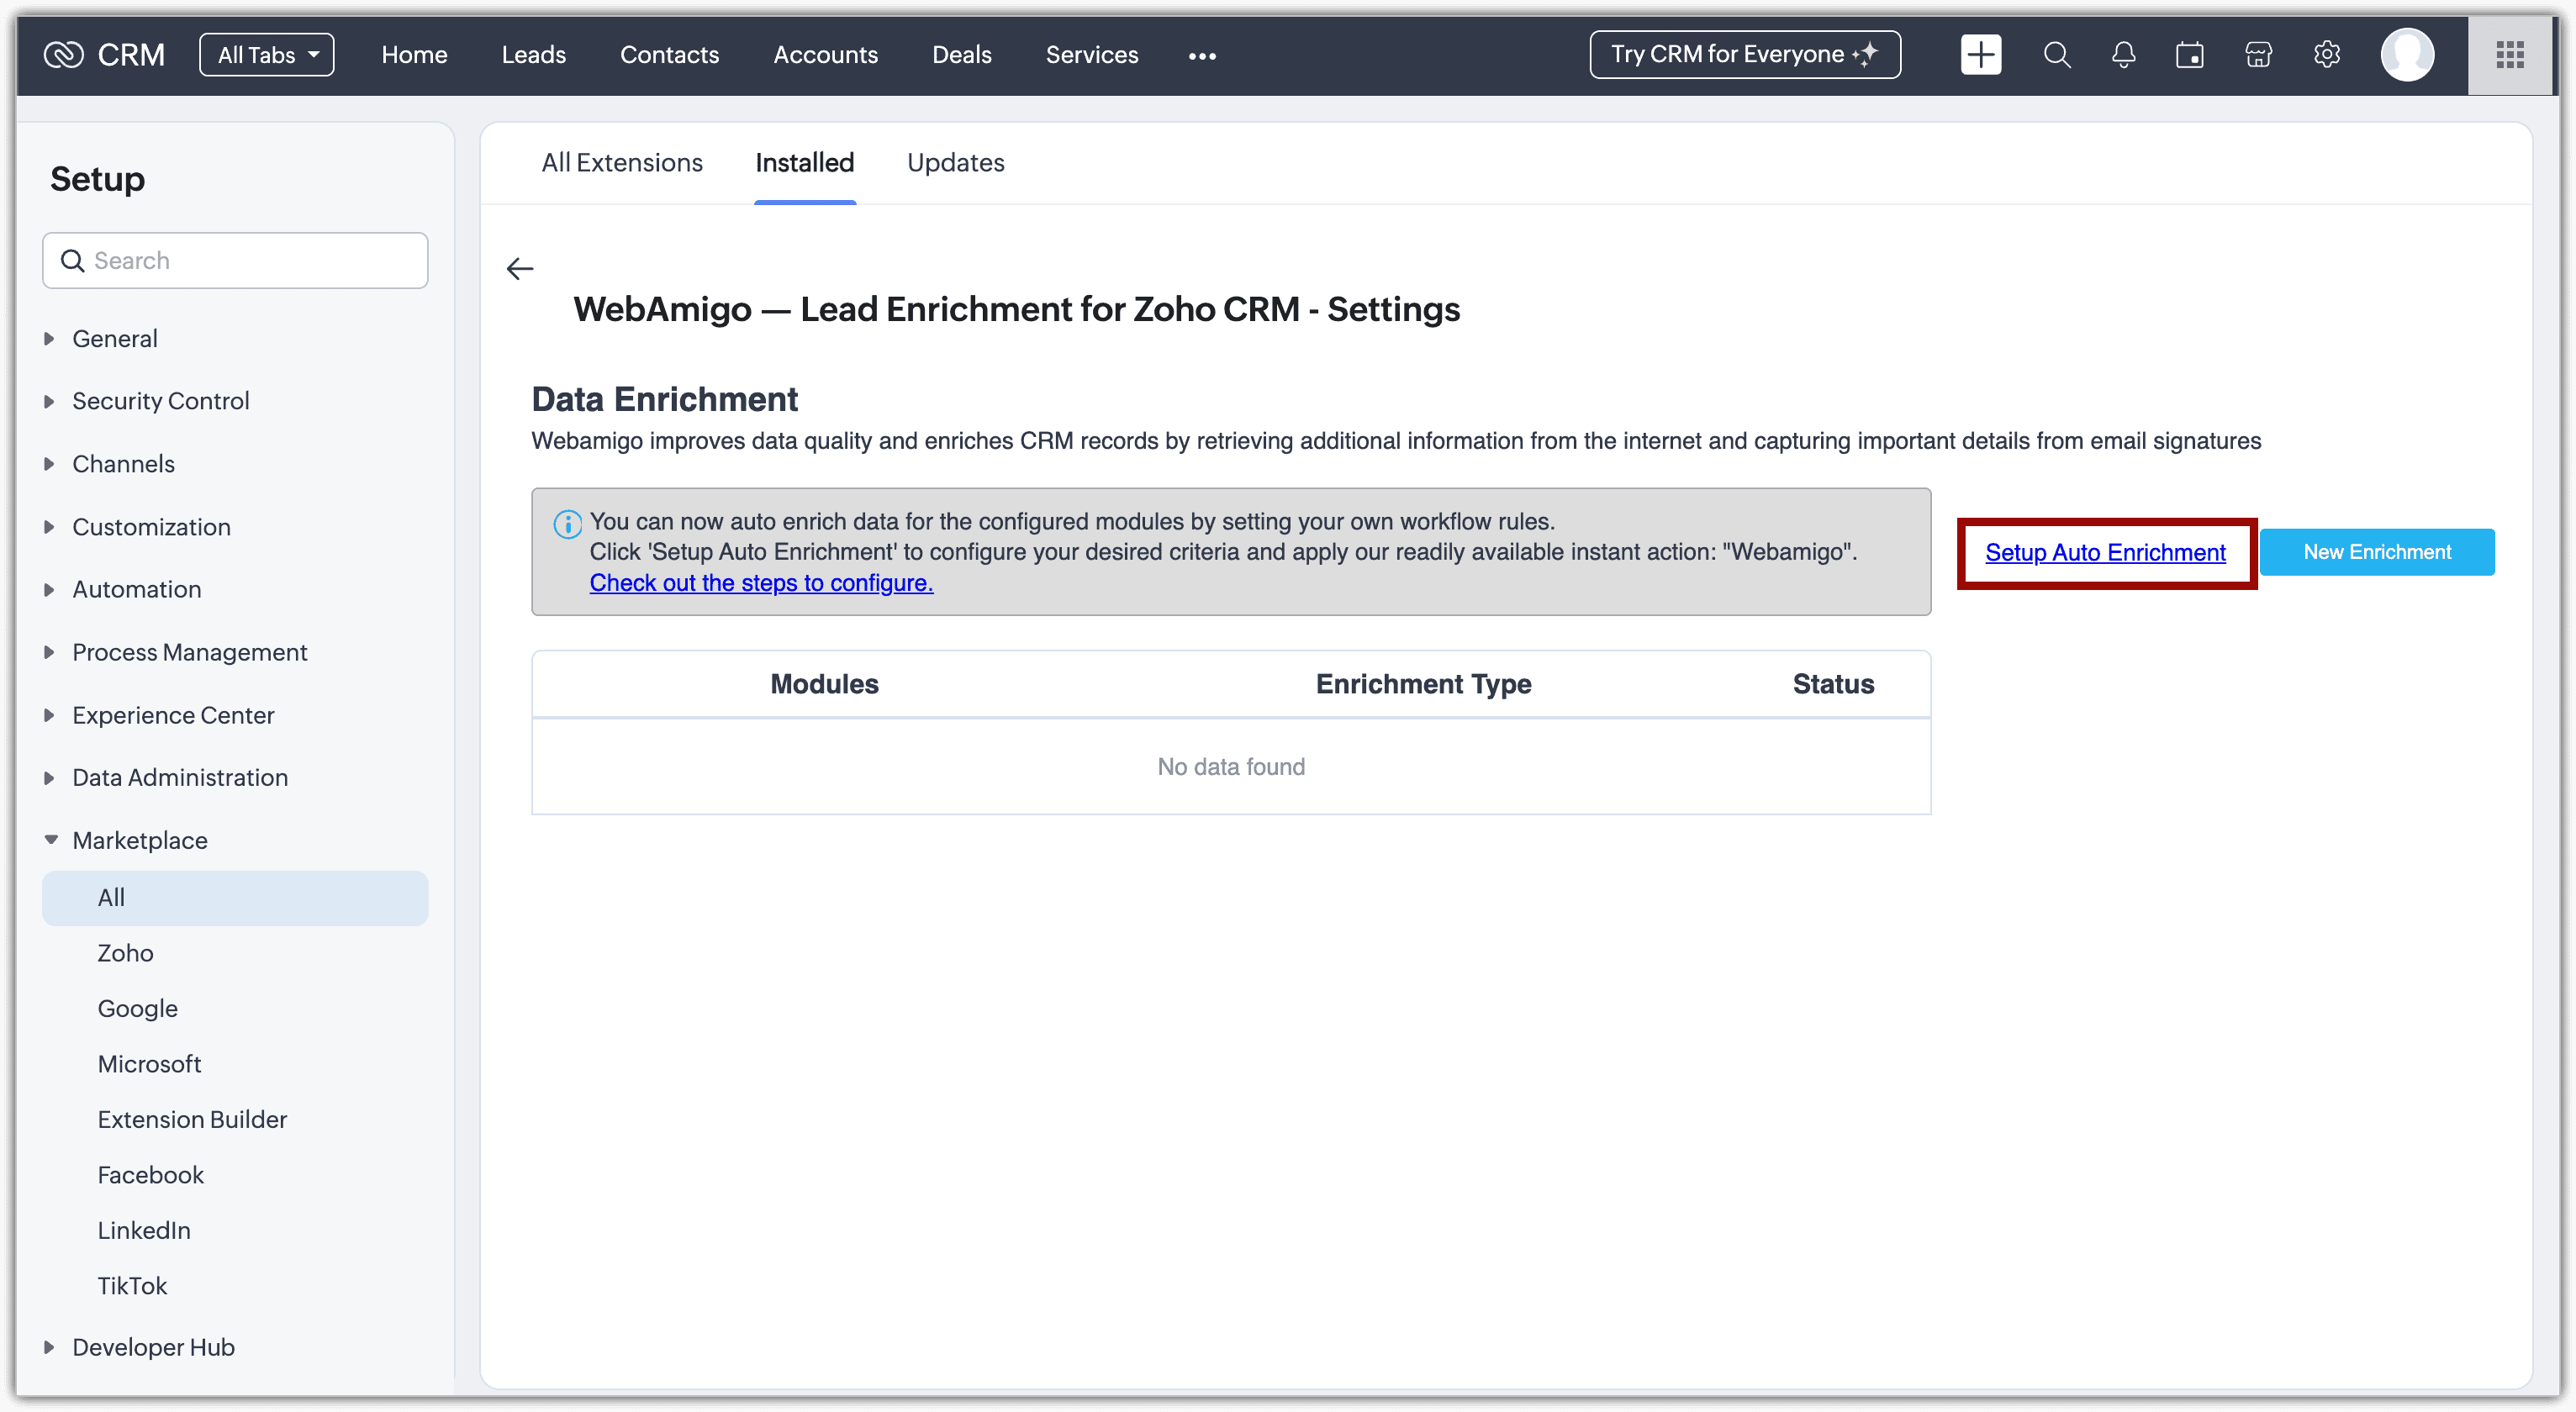
- On the WebAmigo - Lead Enrichment for Zoho CRM - Settings page,
click the Setup Auto Enrichment option.
You will be taken to the Workflow Rules page. - Click the Create Rule button.
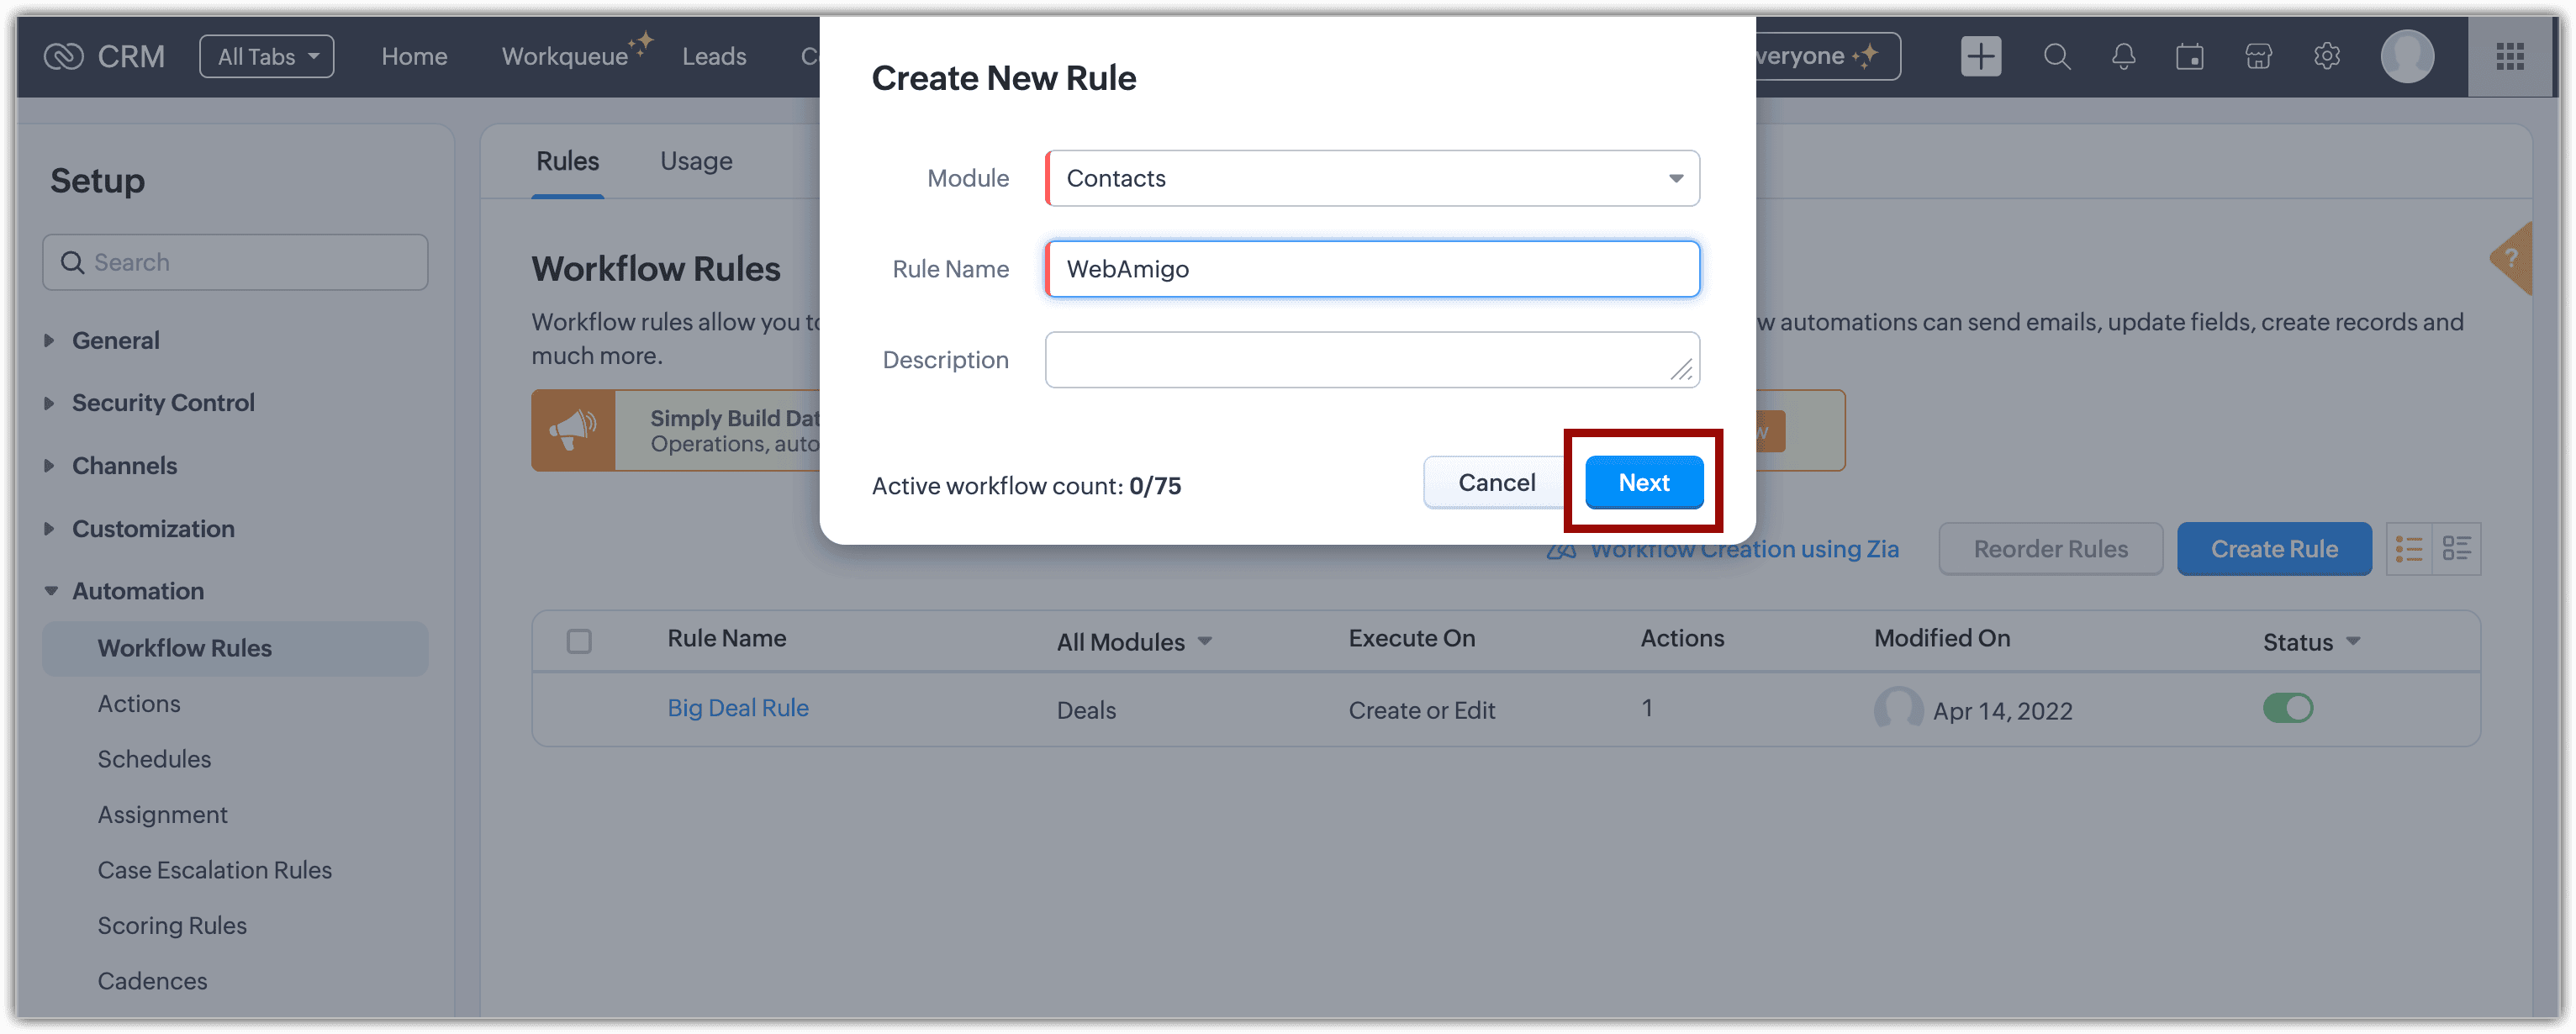
- In the pop-up:
- Choose the Module from the drop-down, for which data enrichment is completed.
- Provide a Rule Name of your choice.
- Enter a description.
- Click Next.
- Define your own workflow rule (we have taken creating a new record as an
example; while the steps remain the same for all conditions, the options
vary).
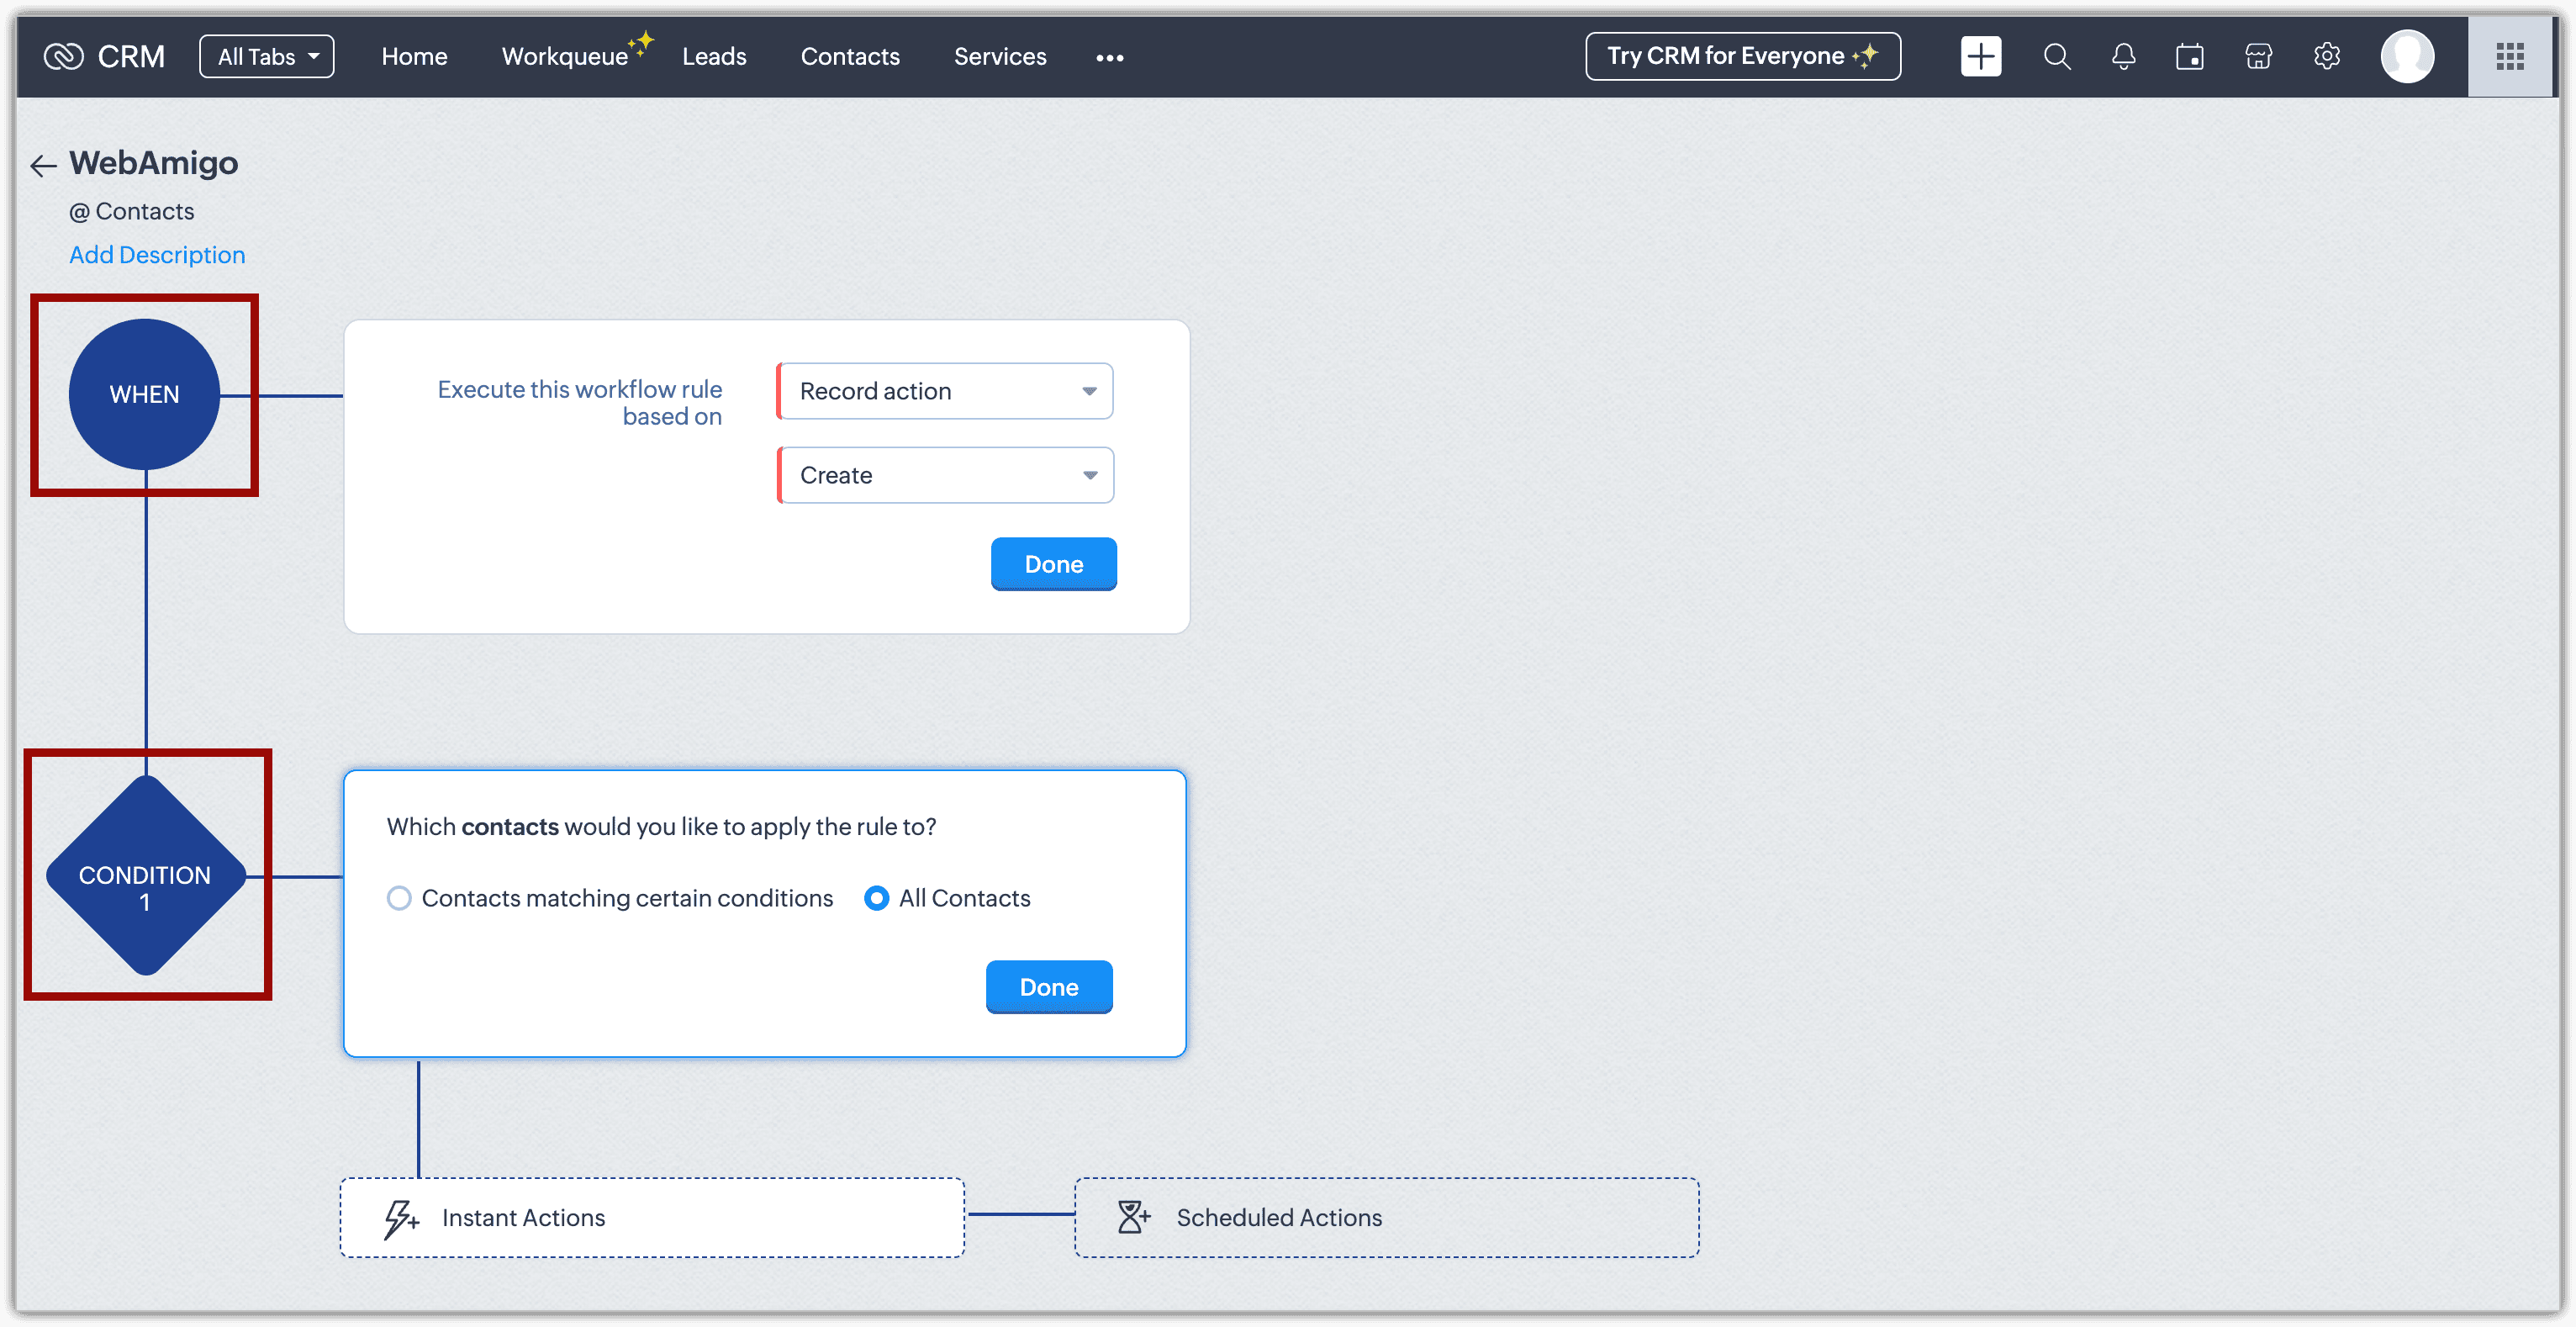
- In When, choose Record action followed by Create, and click Next.
- In CONDITION 1, choose an option, and click Done.
- In Instant Actions, choose Webamigo (webamigoapp).
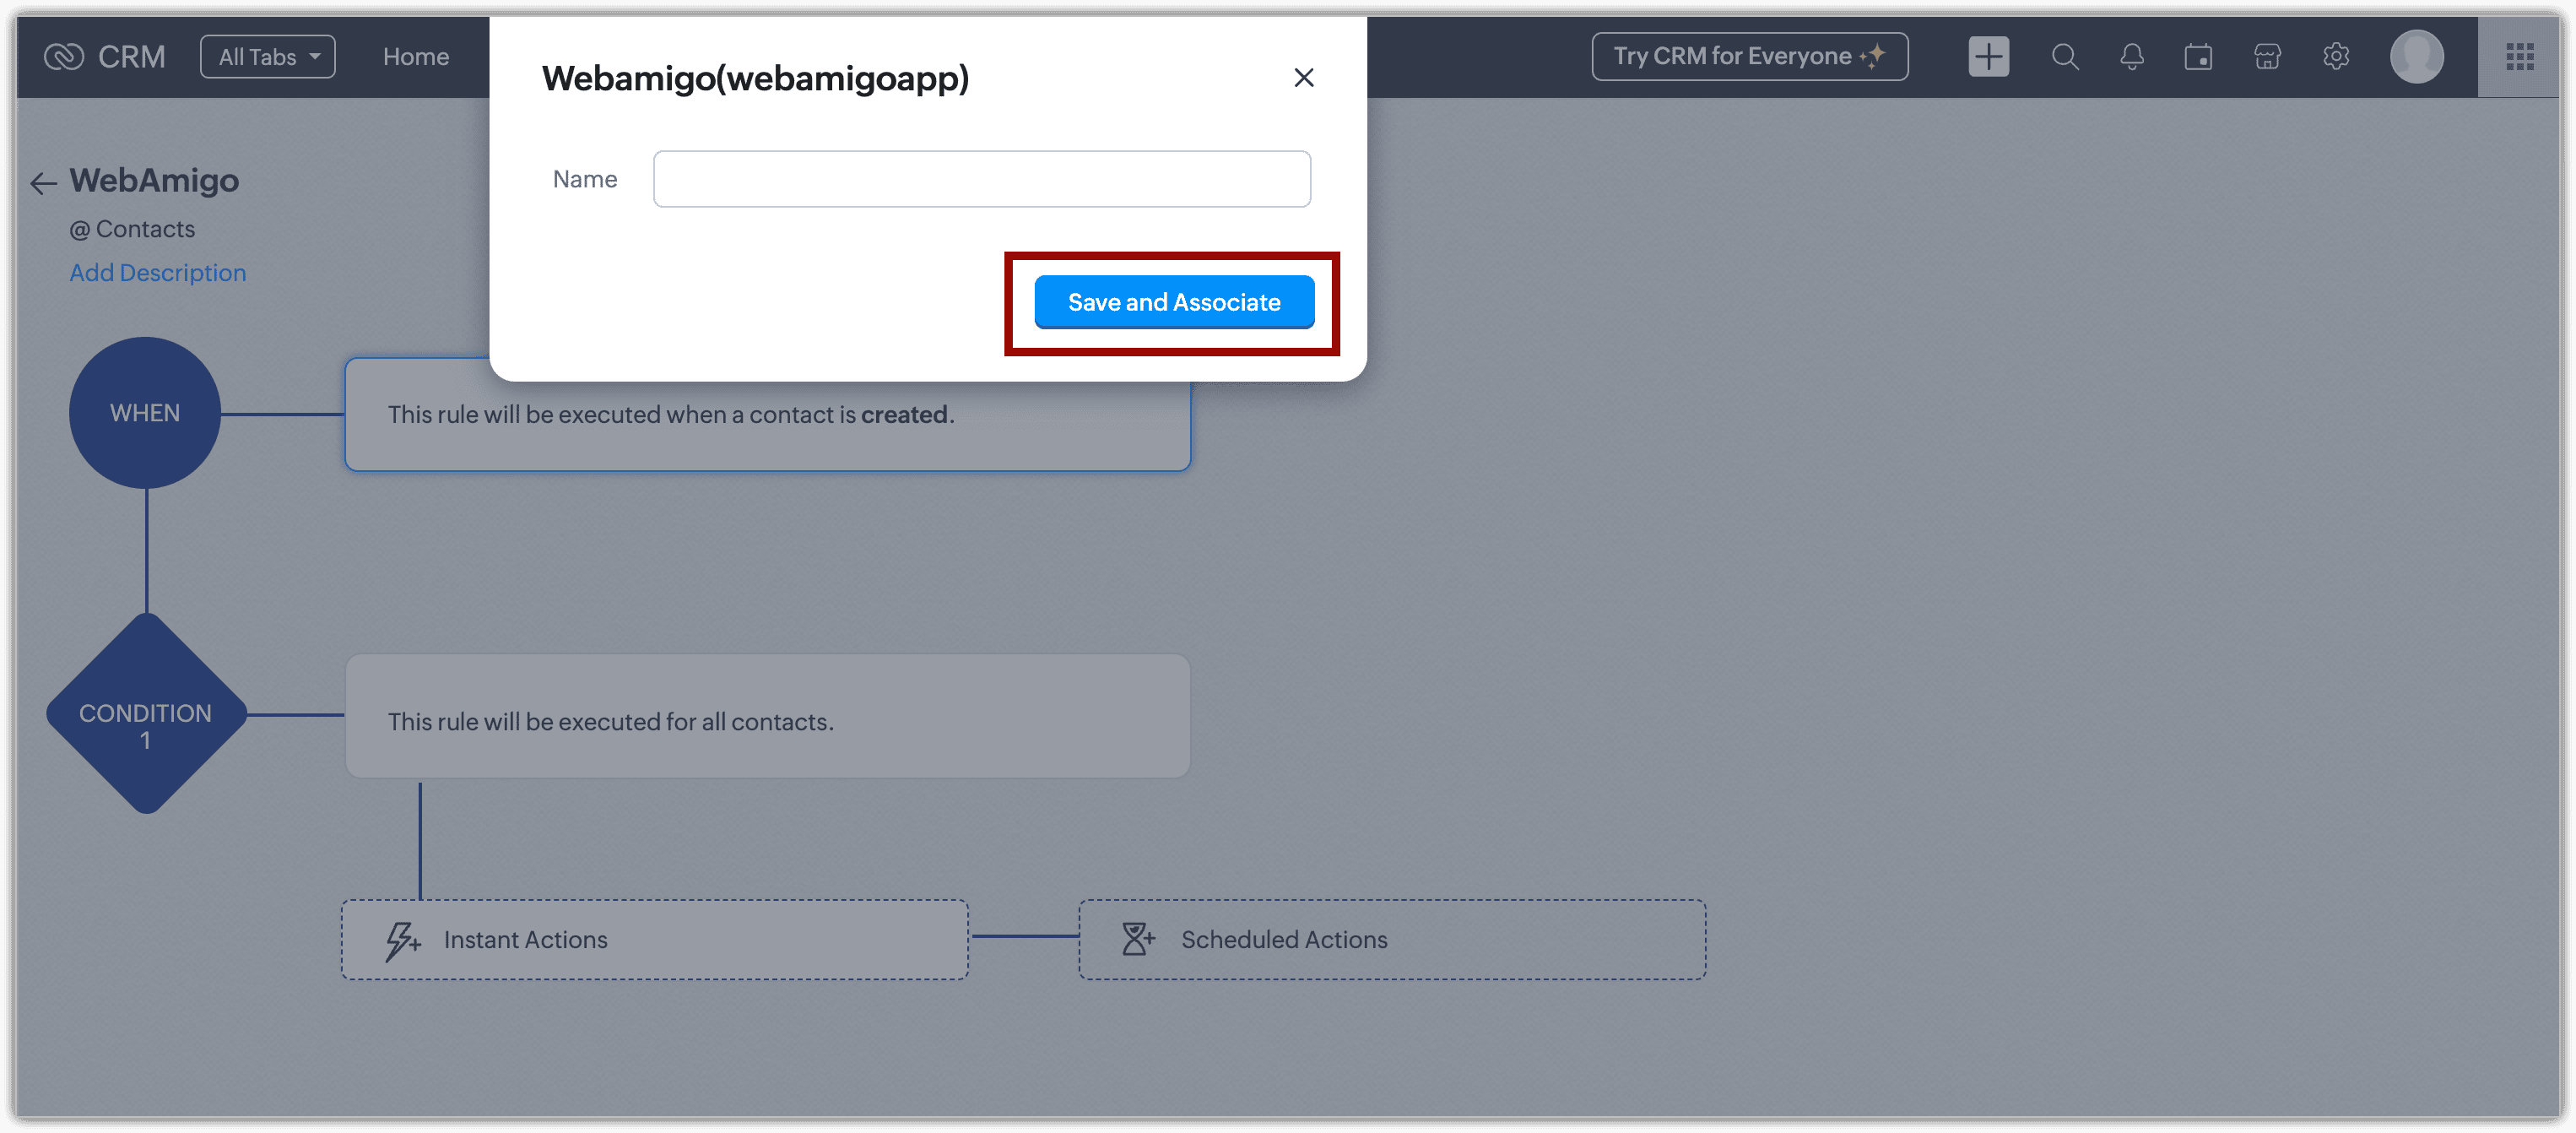
- In the pop-up, provide a Name and click
Save and Associate.
An instant action with the name you provide will be created.
 Tip: If you have any other custom actions created, all actions will be listed within Custom Actions.
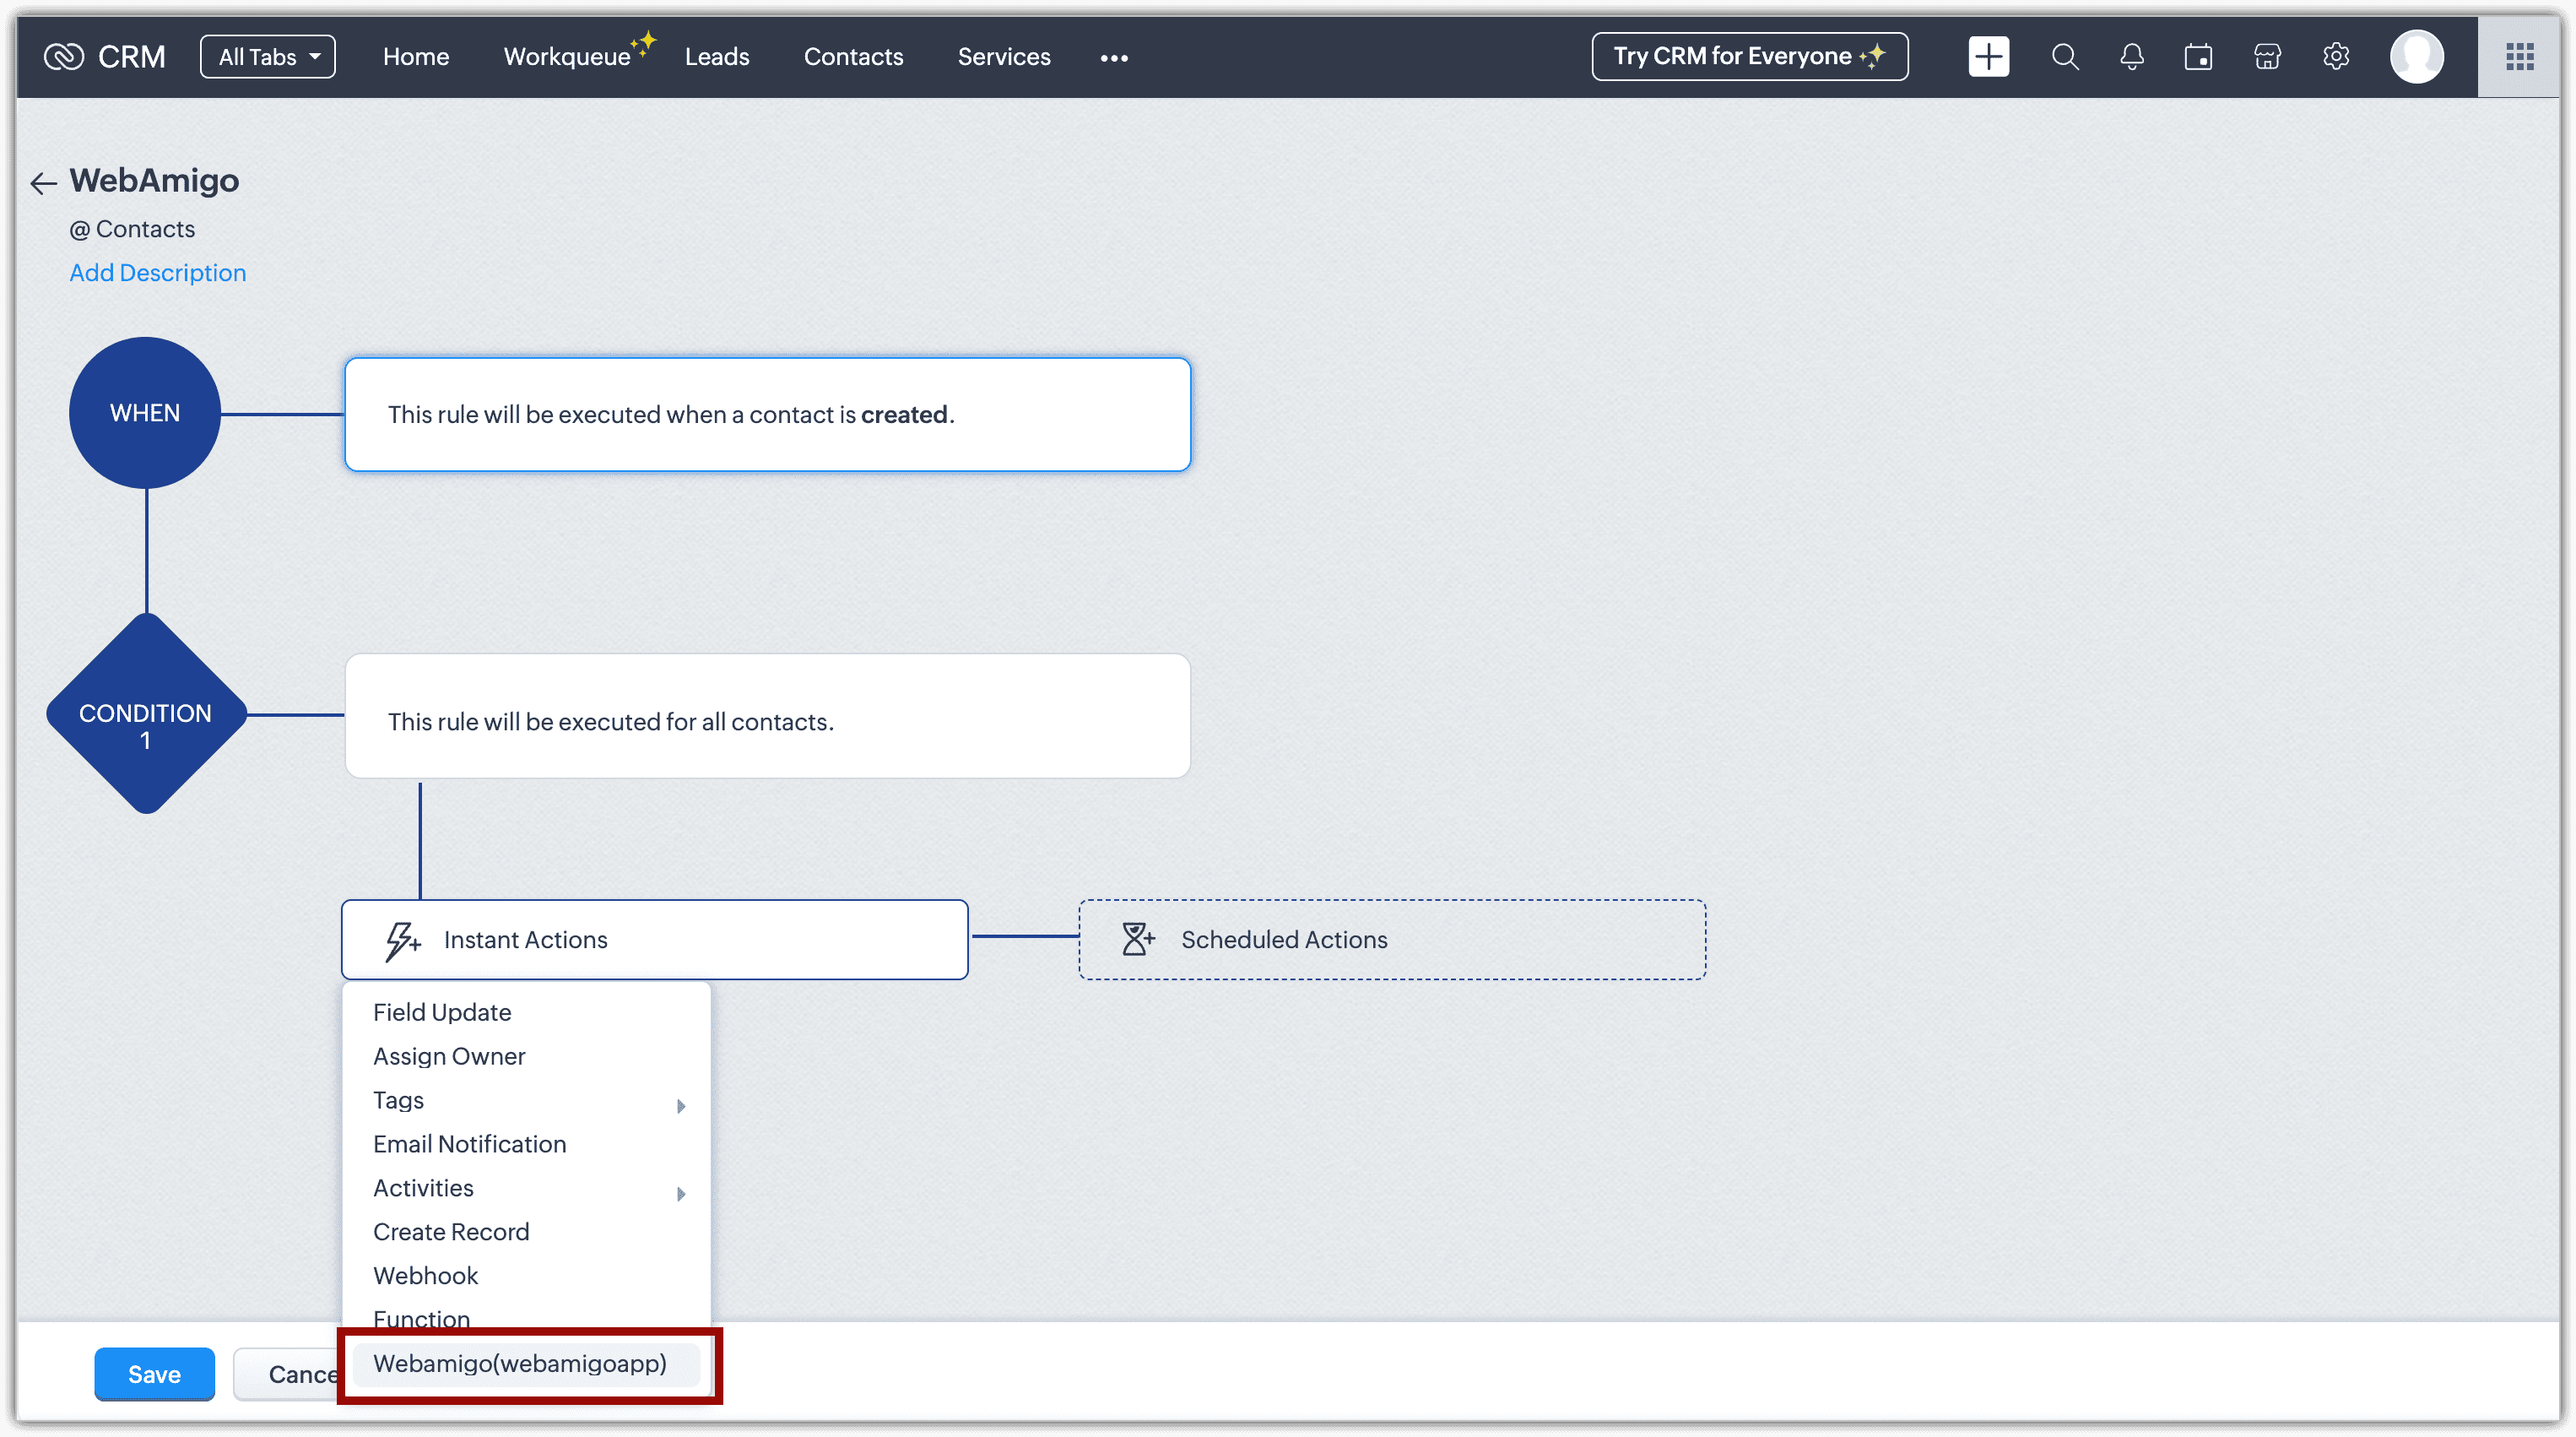
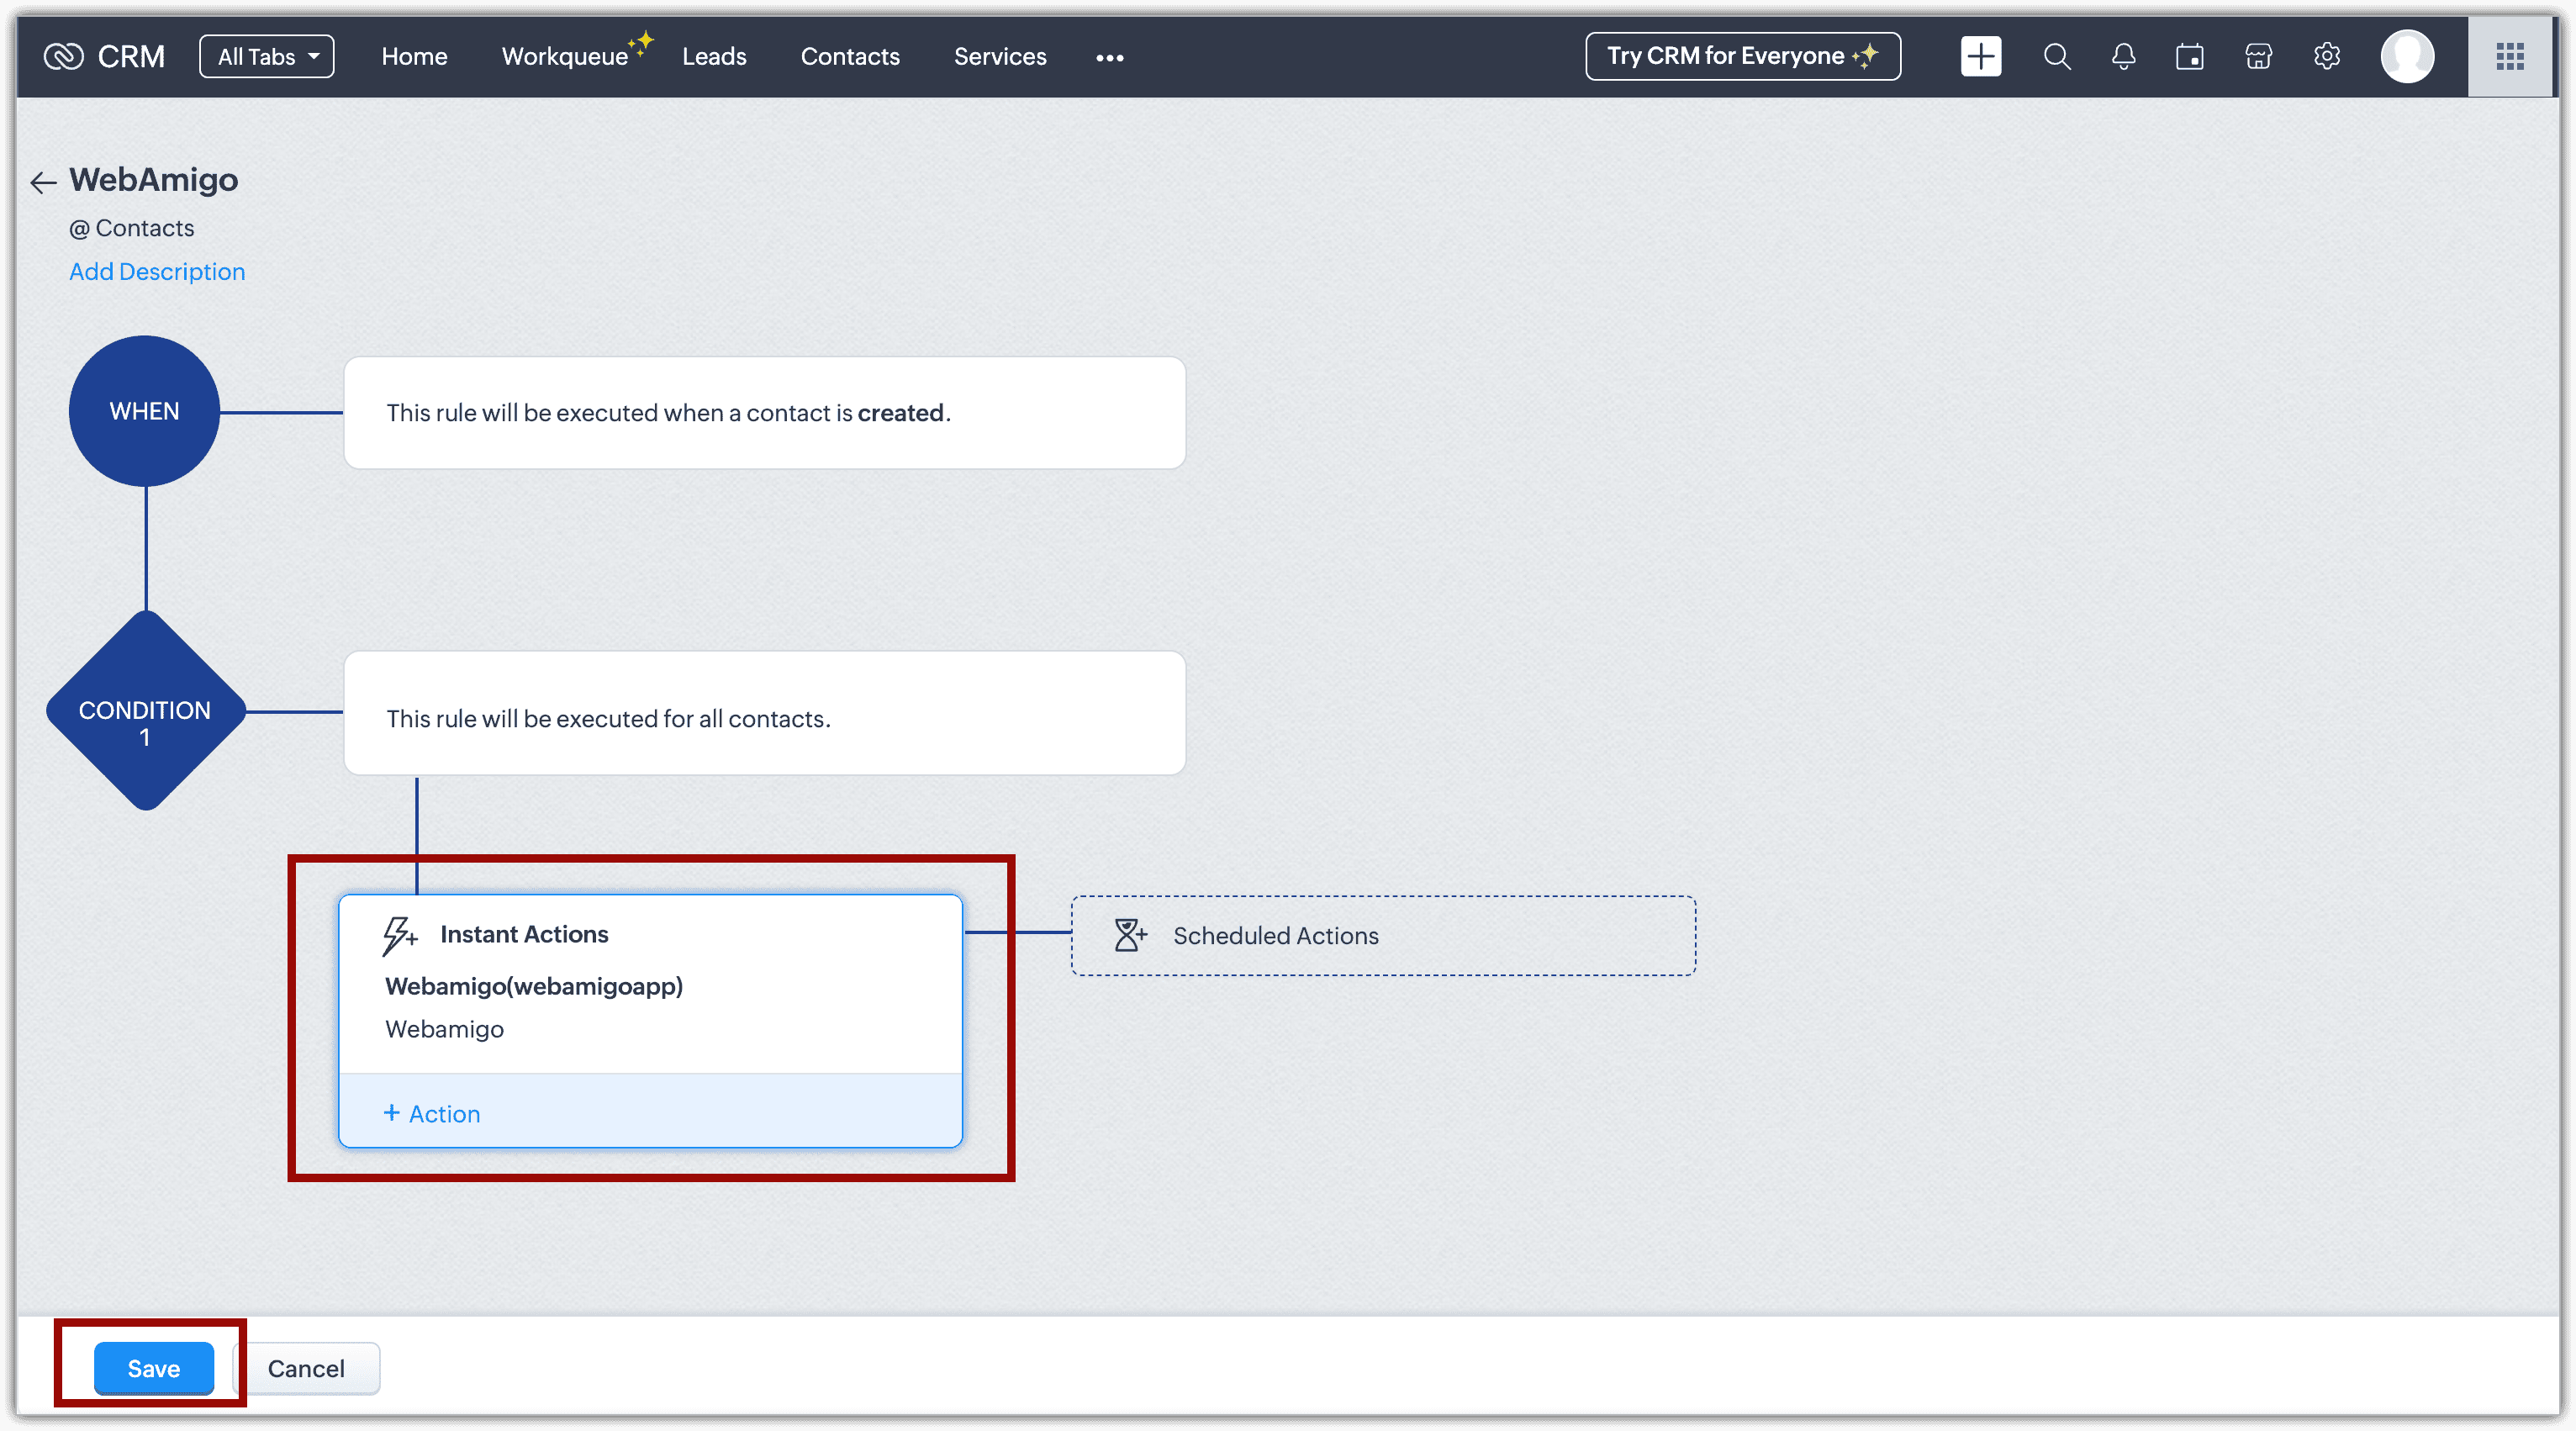
- Click Save. The newly created workflow rule will be created and listed in the Workflow Rules page.

With this workflow configuration, whenever an event occurs in Zoho CRM matching your conditions, the corresponding data will be enriched automatically. You can also create multiple workflow rules for different conditions.
To purchase addons
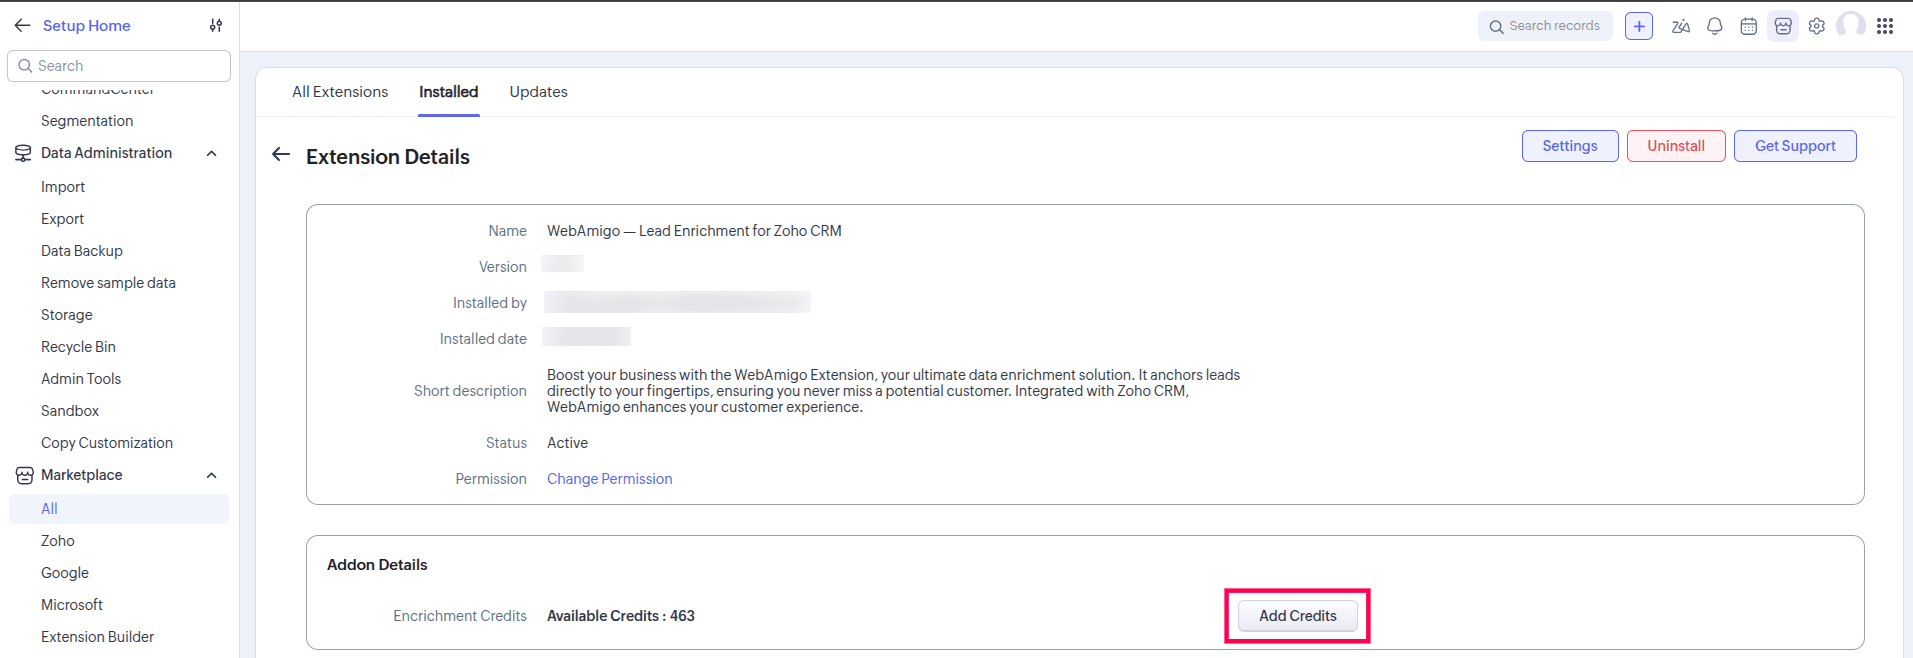
- Navigate to Setup > Marketplace > Installed.
- Click on Configure in WebAmigo - Lead Enrichment for Zoho CRM extension.
- Click on Add Credits to purchase credits.

Uninstallation
If you wish to remove WebAmigo - Lead Enrichment extension from your account, you can easily uninstall it from the Marketplace within your Zoho CRM platform.
To uninstall
- Navigate to Setup > Marketplace > Installed to view all extensions added to your account.
- Locate WebAmigo - Lead Enrichment from the list of installed extensions and select Uninstall.
- Click OK to confirm and complete the uninstallation process.
WebAmigo - Lead Enrichment will automatically disconnect from your account and revoke all associated permissions once it's uninstalled. Your existing CRM data will remain unaffected.